Advanced functions Configuration
This feature is considered one of the available options in the Tasks. However, as this feature has lots of capabilities and various ways to use, we dedicated a whole new article for this.
URL Condition
This is the condition that's necessary to be met for triggering the configured task and function. You should select either "CONTAINS" or "EQUALS" option for the page you want to trigger the click on.

This is not the link or address you want the bot to click on it. This is the page address that you want the desired action to happen. So, if you want to click on about us button or link in your main webpage, you should write your webpage address.
If you select EQUALS, the bot will be sensitive on each single character of the URL and missing even a slash can cause the bot skip the functions. We would recommend you to use CONTAINS as much as possible
Actions
There are few options available for configuring the actions.
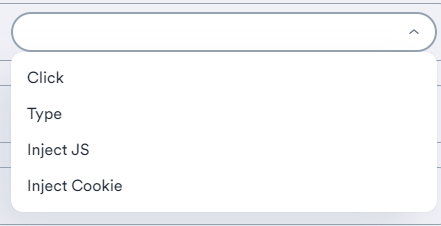
Click
You can select any HTML element to make the bot click on. The element can be included inside an Iframe as well.
Type
You can select any HTML element to make the bot type a value in. The element can be included inside an Iframe as well.
You can use the spintax syntax for text input. The format will be like
{text 1|text2|text3}
By this format, the bot will rotate and select a random text between those. This is an advanced example:
This is {a sample|an example|a documentation} and I {love|like} it
One of the possible outputs for this will be:
This is a sample and I like it.
Inject Cookies
You can inject cookies to the specified website or webpage. The format of cookies should look like this:
[
  {
    "name": "datr",
    "value": "GjrtYmdZALiMxMNo8yDGMKRD",
    "domain": ".facebook.com",
    "path": "/",
    "expires": 1722786076.227157,
    "size": 28,
    "httpOnly": true,
    "secure": true,
    "session": false,
    "sameSite": "None",
    "sameParty": false,
    "sourceScheme": "Secure",
    "sourcePort": 443
  },
  {
    "domain": "website.org",
    "hostOnly": true,
    "httpOnly": false,
    "name": "ezux_tos_357364",
    "path": "/",
    "sameSite": "lax",
    "secure": true,
    "session": true,
    "storeId": "0",
    "value": "19",
    "id": 18
  }
]
Inject JS Code
You can inject any kind of JS code to the specified website or webpage. This will have the same result as like running the code in the console of inspect element.
alert('nice!');
Select HTML Element
To use the Click or Type actions, you need to utilize the HTML element selector feature. After you select Click Or Type from the actions list, you'll see a section like this:
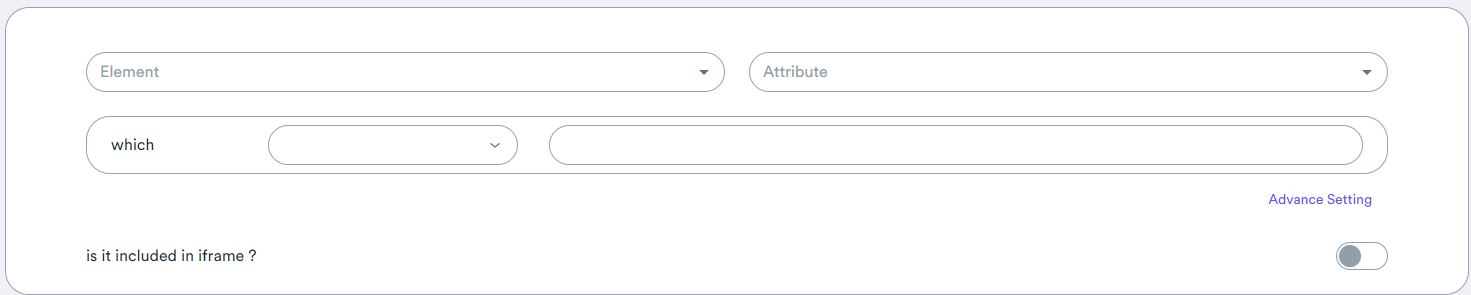
Element conditions
HTML elements starts with a tag name and consist of attributes. You can use them for targetting your desired section.
You can read more about the HTML elements from here:
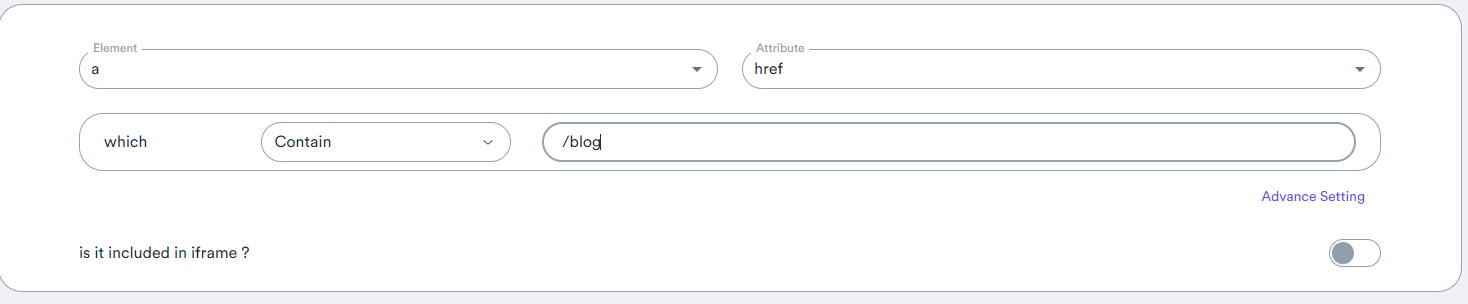
In this simple HTML element form, you'll need to select the HTML tag and the attribute of it that you want to target with.
You need to try to use an attribute which is exclusively used in the desired element. There can be lots of other elements with your selected attribute and this will cause the bot to click on wrong element.
Elements on some websites like Google or Facebook have dynamic values for their attributes. To accurately target these elements, it is essential to identify a specific attribute or recurring value.
We would recommend you to refresh the webpages several times to make sure the values or attributes don't change.
If your element is included in an iframe (this happens usually in consent or ad forms), you need to enable "It's included in Iframe" option then select the Iframe element. It's the same selector used for other elements.
Advance Element Selection
If you need more control on the HTML element and you want the bot to customize the selectors or provide the item id, you can click on "Advance settings" in the element selection part and you'll see a section like this:
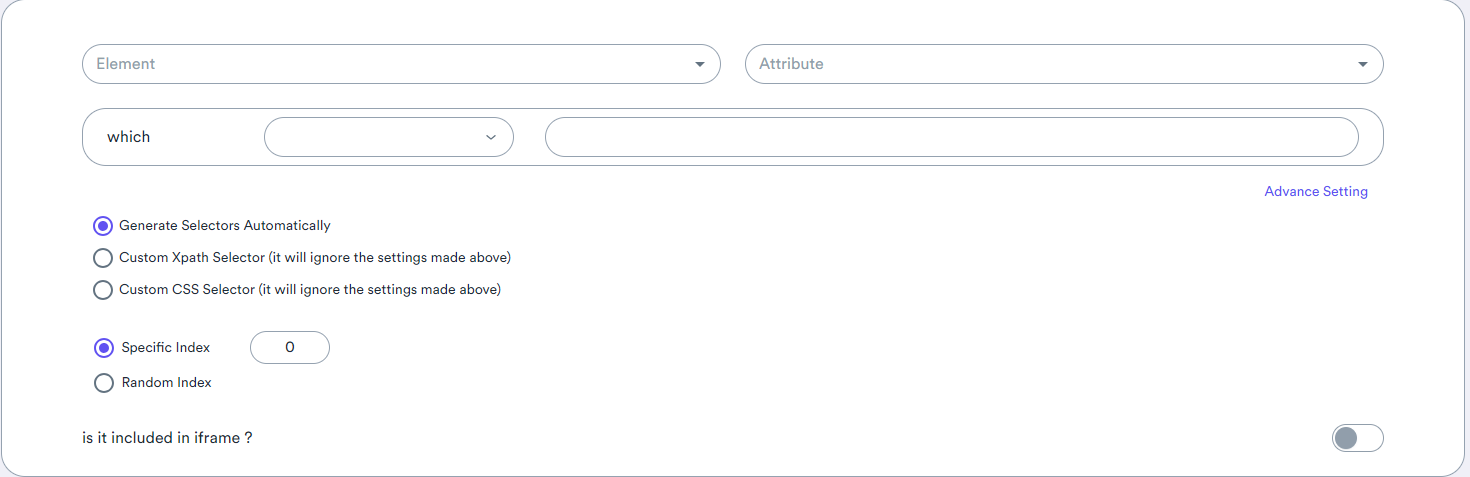
Custom CSS Selector
If you're already familiar with CSS selectors, you can select the "Custom CSS selector" and write your CSS selector in the input.
You can take CSS selection courses and read more about it to get hands on this feature. This will help you a lot in setting up this feature.
Custom XPath Selector
If you're already familiar with Xpath selectors, you can select the "Custom Xpath selector" and write your Xpath selector in the input.
You can take Xpath selection courses and read more about it to get hands on this feature. This will help you a lot in setting up this feature.
Custom Element Index
If you're selecting a range of elements and you want the bot to click on a different index rather than the first item, you can enable this feature. You can also make the bot to click on a random item.
Index of the elements starts from 0. So, the first element has the index of 0
Delay Time
You can specify a delay time that you want the bot to wait before executing the provided functions. This delay time will work when the conditions have been met. For instance, if you want the bot to click on "about us" button after 20 seconds of going to "dalga.dev", you can enter the delay time as 20-20 seconds here.

Chance
You have the ability to define the ratio at which you want the bot to perform the action. So, if you prefer the bot not to execute the function every time that conditions are met, you can enter your desired percentage here.

Order of functions
The bot will start checking and triggering the functions from the first provided item. However, if you want the bot to choose the functions and start triggering them randomly, you can select "Random" option here.