Initial Configuration
Campaign consists of different configurations that you can read below.
Import
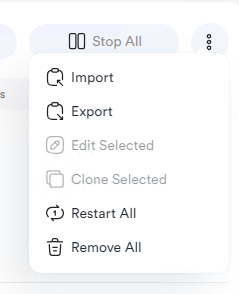
You can import the campaigns from 3 different methods. To import the campaigns, you need to go to the campaigns tab > Click on 3 dots (more) > Import.
Import from a Text File
You can import tasks from a text file using this format separated by a single new line.
keyword:website.com
keyword2:website2.com
If you're going to send direct traffic and you don't need to use keywords, you can write only the webpage address.
After selecting the text file, you would need to select a campaign to clone (copy) its settings.
If you have not created a campaign yet, you need to create one sample campaign before going to import the file.
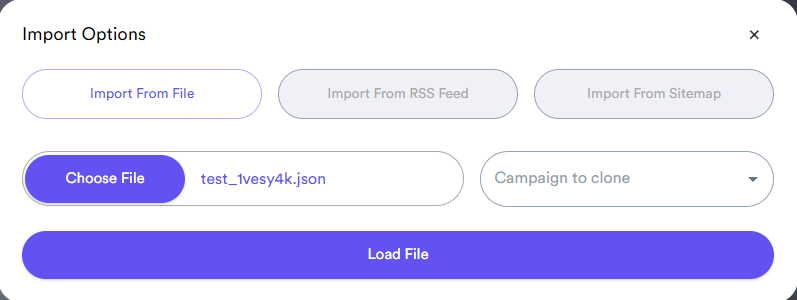
Import from a campaign file
You can export the campaigns and import them later in your current machine or in the another machine. The format of exported file is usually .JSON or .atb.
You need to simply choose the file and click on the load button without needing to select a campaign to clone its settings. However, you can still do that if you want to change the settings.
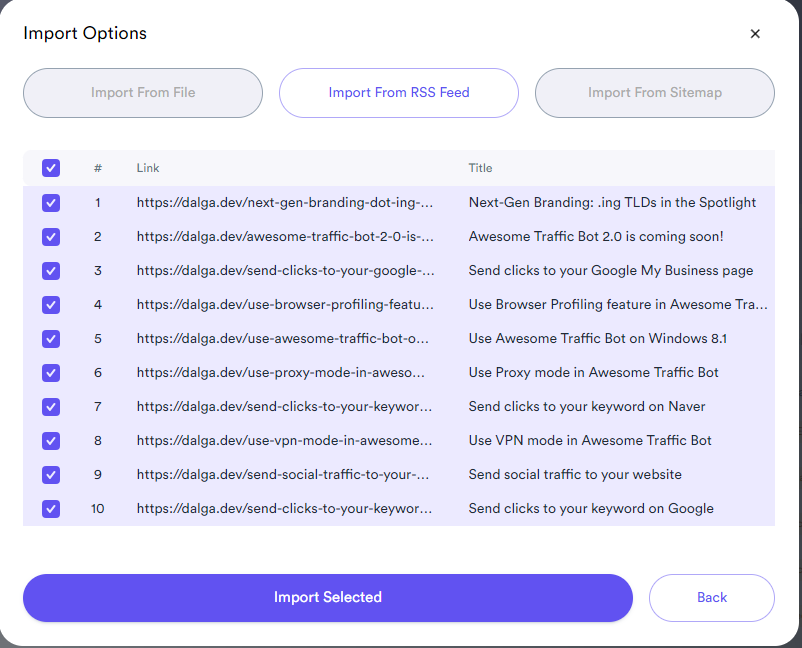
Import from a RSS
Wikipedia:
RSS is a web feed that allows users and applications to access updates to websites in a standardized, computer-readable format.
You can import from your RSS address. By using this method you won't need to add each link of your website articles one by one. All you need to do is entering your RSS address (and making sure it includes articles) then selecting the number of articles you want to import.

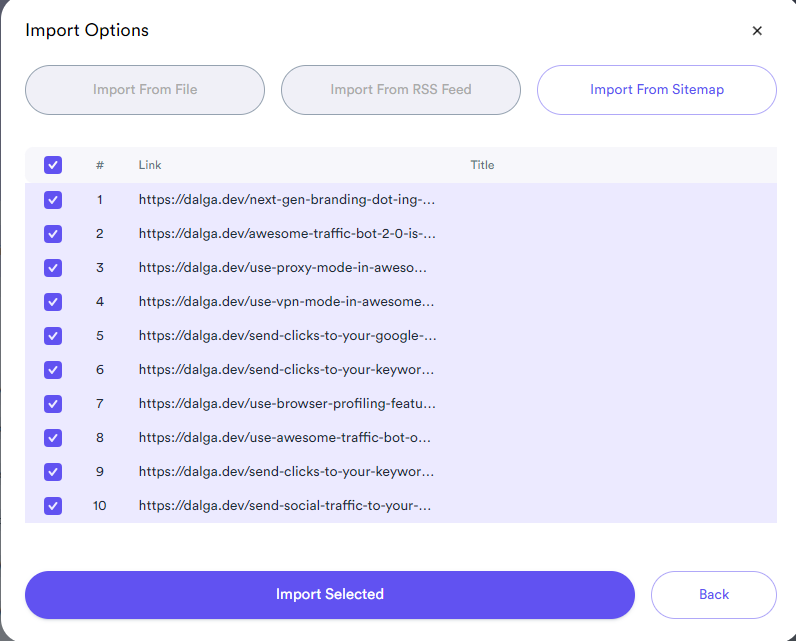
Import from a Sitemap
It's the same with importing from a RSS address feature. However, in this method you'll need to provide a sitemap address instead of RSS. Also, it's worth noting that sitemap will not return an article title but only the URLs. So, if you need to send direct traffic or add keywords manually, this might be suitable. Otherwise, RSS is a better option
Basic Configuration
Most of the fields like Name, Tags, Block Resources, etc. are self-describing. So, to prevent duplicated information, we've not written about how to set up a name, tag, etc. You can read about those fields here.
Multi Threading
The application has a default value of threads that you can make the bot to start. For instance, you can make the bot to use 30 threads and split the campaigns among them.
You can read more about the Threads and available options here

Default
This is called default or local threads which you can set in the Thread Page or click on the 'default' button in the settings to open it as a model:
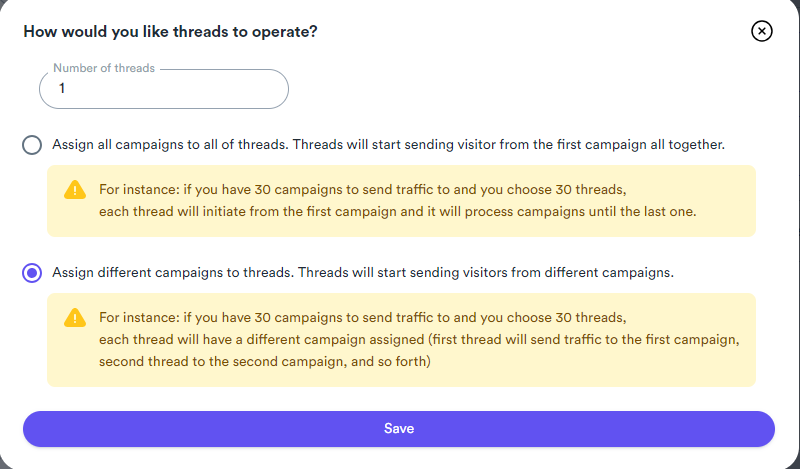
Custom
This is when it gets interesting. Imagine you're currently running the bot with 4 threads. However, you want to create a campaign and make it run and complete faster without affecting the currently running ones. You can set a custom number of threads dedicated for this campaign. So, for instance you can dedicate 10 threads for a single campaign to make it work 10x fater than others. The bot will start 10 dedicate threads (apart the general and local ones) for this campaign and when you stop this campaign, all of those threads will end as well.
Browser Profile
Well, today, the history and background of users’ activities on the internet play an important role for companies in determining the quality of visitors and the impact of the searches.
It seems pretty obvious for each one of us, we care for recurring visitors, clients, and even events more than others! We humans also listen to advice and feedback from known users much more than an unknown person!
It’s also the same thing when it comes to big tech companies like Google, Facebook, etc. If you’re an active user with a strong background, your feedback and activities have lots more impact in comparison with a newly created user that nobody has a clue of.
This feature is being used for creating credibility and warming up browser profiles for more advanced tasks. You can customize the behavior of browsers and the way that bot manages the browser profiles. If you want to save browser profiles (including cookies, history, password, etc.) after creating the profiles and accomplishing the added tasks and campaigns. After saving them, you can also use the saved profiles later. This gives you the flexibility to do advanced tasks that you need warmed up and background of history.
Use with Search Engines – wow!
You can use the bot for Search Engines. Awesome Traffic Bot can be used as a google organic search bot and CTR manipulation software. With this feature, you can start campaigns with random keywords semi-related to your target keyword (but not exactly) and let the bot browse other websites, watch videos, etc., for a few days. Then after warming up the browser profiles, you can make the bot target your main keywords with those warmed-up browser profiles!
You know what’s even more interesting?! You can link Gmail accounts to browser profiles! From now on, if you use Gmail Accounts, it will use browser profiles -instead of cookies the bot using before-, so you can make a browser profile that’s active and at the same time it’s logged into a Google account!
Make Returning visitors!
If you’re looking to make returning visitors, or it’s part of your plan to send like 20~30% returning visitors, this feature will help a lot! We’ll add more features to make this kind of setup much easier in the “visiting other web pages” feature soon. So, the bot will handle all calculations, save or remove in itself. But for now, you can do that by manual configuration!
How to use Browser Profiling feature?
STEP 1: Let’s dig into it! To use this feature, you first need to enable the related checkbox and then click on it to open up the settings. You’ll see something like this:
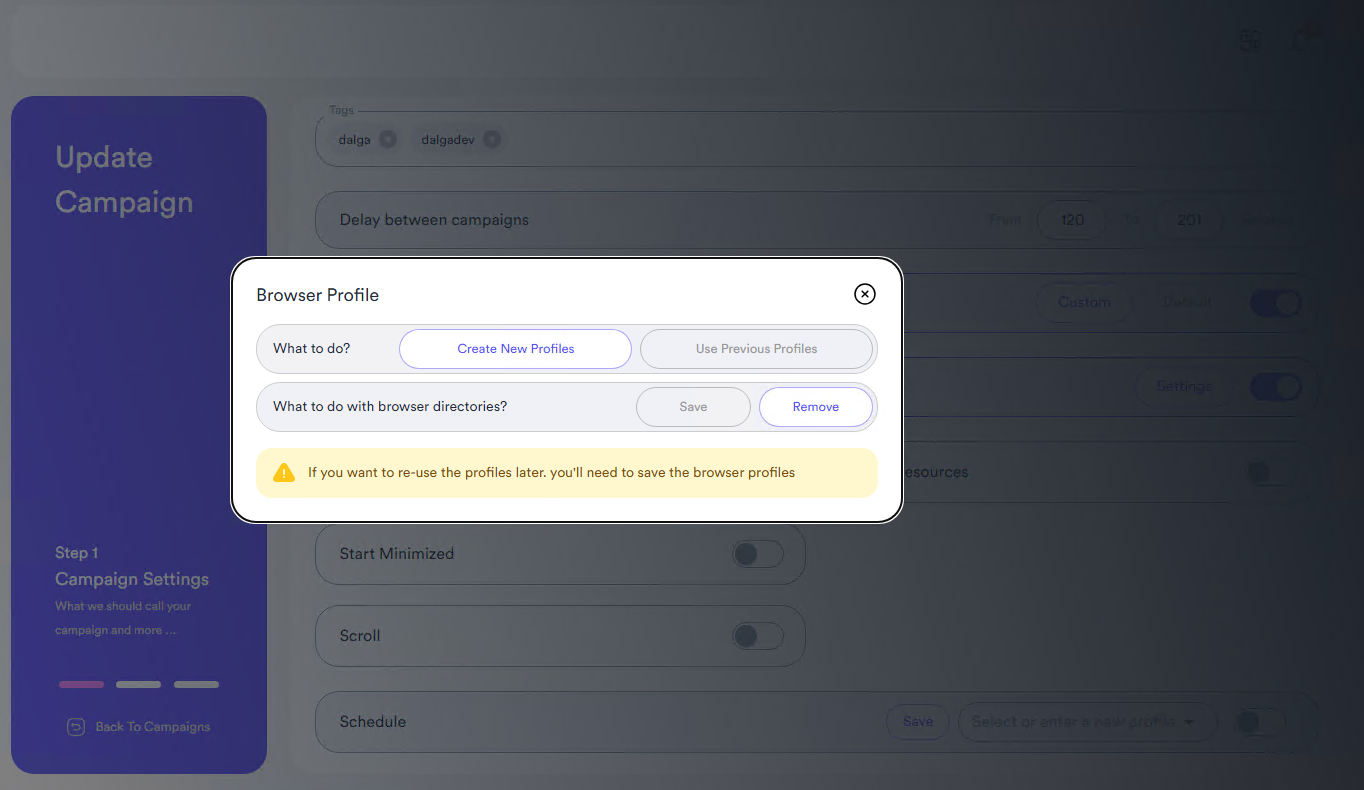
STEP 2: There’s two options to start with: Create new profiles/Use Previous profiles
There are also two options to set what we need to do with browser directories. If you want to use the browser profiles later, you would need to save the browser directories, so you would need to choose “Create new profiles” and then “Save” the directories”. As soon as you choose the save option, you will see some new extra options will come up.
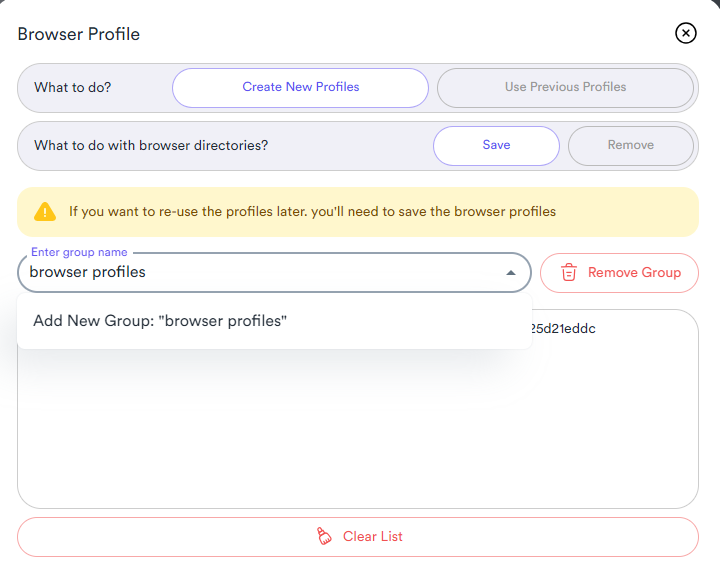
STEP 3 – Name your profiles : Here, we can (and must) name the profile group we want to create profiles and include new profiles in it. If you’ve created a Profile Group previously, you can also select from the available ones.
After naming a group, you would need to click on the add button to add that group.
STEP 4 – Run the bot : After you did configure the rest of your application – every traffic mode is supported- click on the start button to run the application. The bot will start creating profiles and it will add to the profile group you’ve selected. That’s it!
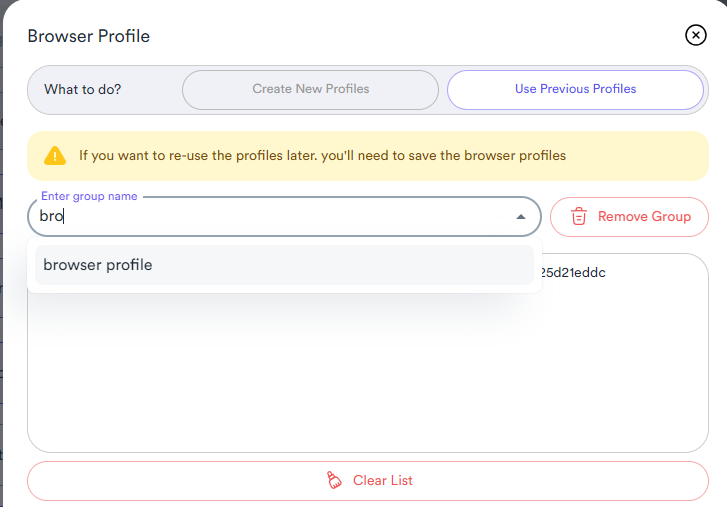
STEP 5 – Reuse the profiles! : After you let the bot run for a few minutes and deliver the traffic, you’re ready to use the previous profiles! Click on the settings, and this time you would need to enable the use of previous profiles and then choose the profile group!
Schedule
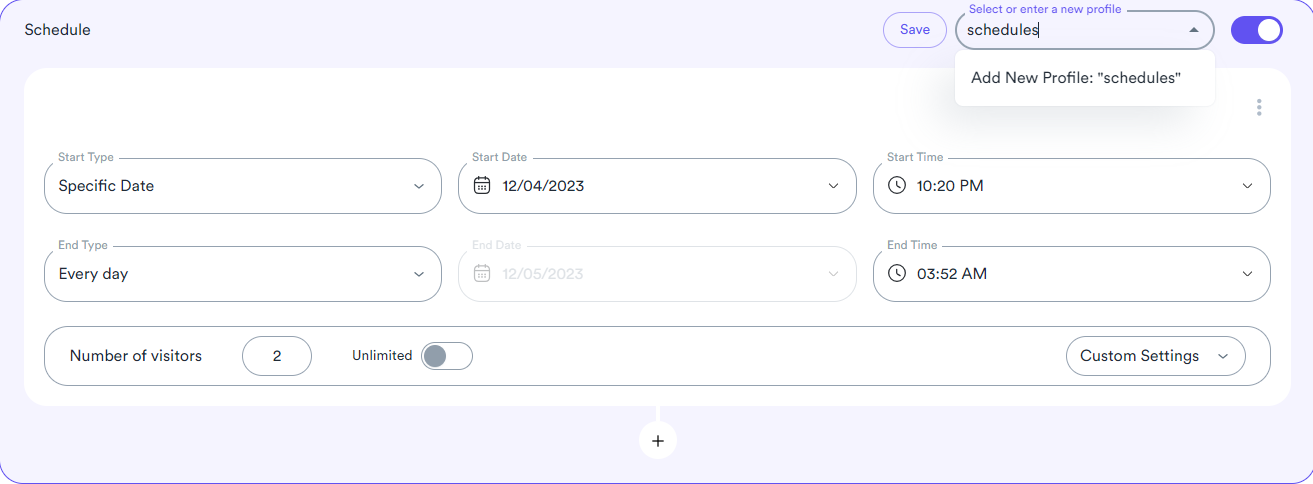
To schedule the campaign, you need to turn on the scheduling feature and set it up as you like. These are the available options in the scheduling feature:
You need to start the campaigns in order to schedules start working. Essentially, the scheduleing feature works by limiting the time frame that bot can send traffic to the campaign while it is running. Should you pause the campaign or fail to launch it, the scheduling mechanism won't automatically start those campaigns for you.
Every day
You can make the bot start and end in specific times each day. To set up a daily recurring campaign, you need to select this option as the start and the end.
Weekdays
You can make the bot start and end in specific time of weekdays. For instance, you can choose the bot to start working in Saturday from 10:00 AM.
Specific Date
You can select a specific date and time to start and end the bot.
Number of visitors
You can select a specific number of visitors to be sent in the chosen period of time. You can also select unlimited to go without limitation.
The total number of visitors specified in the campaign's settings is the overall visitors that your campaign is allowed to proceed. For instance, if you set a total of 10 visitors in the campaign's settings and also configure 10 visitors per day in the scheduling settings, the bot will send traffic for only one day, completing the campaign. To enable continuous traffic for an unlimited duration, select 'unlimited' in the campaign's settings.
Profile Name
After configuring the scheduling feature, you can save them. This will help you to reuse the settings in the future needs. You only need to write a name and save it:
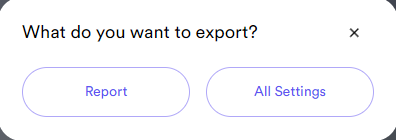
Export
You have the option to export reports or campaign settings, whether it's for a specific campaign or for all campaigns collectively. If you want to export only some specific campaigns, select them in the campaigns tab then click on more > export. To export all campaigns, leave the campaign selection blank and click on the export button:
Export settings
If you want to move some of the campaigns to another computer, take a backup or anything related, you can use this method. The bot will give you a .json file and you can use it for importing in any other devices.
The bot will not move the saved browser profiles, gmail accounts cookies and logs. It will only give you the settings of the campaign. If you want to move all of data to another device, you can move the database file from the installation foder > DB > data.db.
The installation folder is typically located in this directory (if you've not changed it during the installation): C:\Program Files (x86)\DalgaDev\Awesome Traffic Bot
Export Report
If you want to get a general and detailed overview of your campaign performance, you can use this feature. By using this feature, you will receive a .CSV report file containing general information about your campaigns' performance.