IP Changing Configuration
We've descrbied the methods and which one of them are preferred here. Now, we'll check how we can set up each of the methods.
Proxy Mode
The bot accepts HTTP(S), SOCKS4 and SOCKS5 proxies. It doesn't accept IPV6 proxies at this moment. Also, if you're going to use SOCKS proxies, your proxies should be IP whitelisted. In other words, they should not have authentication. However, you can use authentication for HTTP proxies.
STEP 1: Select the proxy mode in the second step of campaign set up.
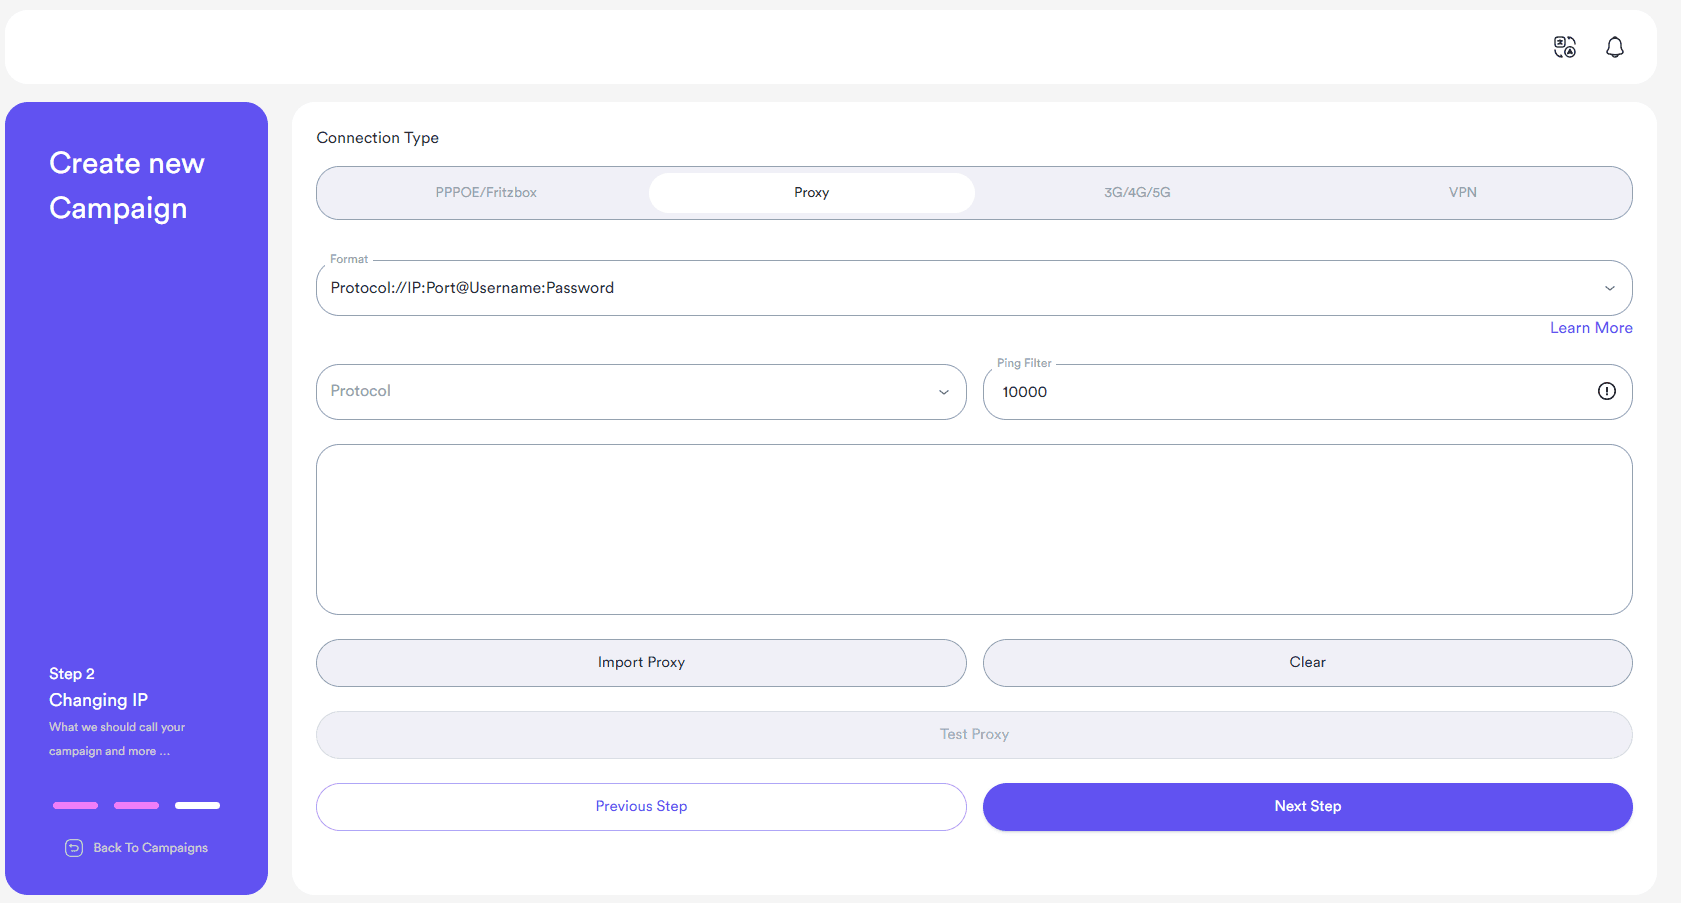
STEP 2: The bot supports various proxy formats. To proceed, you would need to export the proxies from your proxy provider and save them within a text file. Then, click on the drop-down menu in the ATB to choose the format of your proxies.

For instance, if the format of your proxies (in the text file) is:
192.168.0.0:80:username:password
You should select this format from the list on the Import page:
Protocol://IP:Port:Username:Password
It’s crucial to ensure you have selected the correct format. If the format of your proxy text file and the one you have selected in the bot don’t match, the bot will be unable to import the proxies.
The bot also supports rotating proxies with an API to change their IP. So, if your proxy provider has the API to change the proxy IP, you can add it by using the format written below. Other proxies formats are also accepted. You just need to separate the API link by “|” :
Protocol://IP:Port@Username:Password|API Link
The bot will send a request to the API to change the IP after each visitor session gets completed.
All of the other in-house proxies are supported. So, if you have your own proxy warehouse in your home, you can also use this feature.
Ping Filtration is also a way to determine if the proxy that the bot randomly chose has a suitable condition. However, sometimes if your proxies don’t have high speed at all, this feature might cause the bot to stop working. For instance, if you import 800 proxies, the bot will go through them to find the one with the chosen ping filter. This might decrease the performance as well.
STEP 3: Test proxies by clicking on the button. If you imported a lot of proxies, this might take a little bit longer. Please wait for the bot complete the tasks.
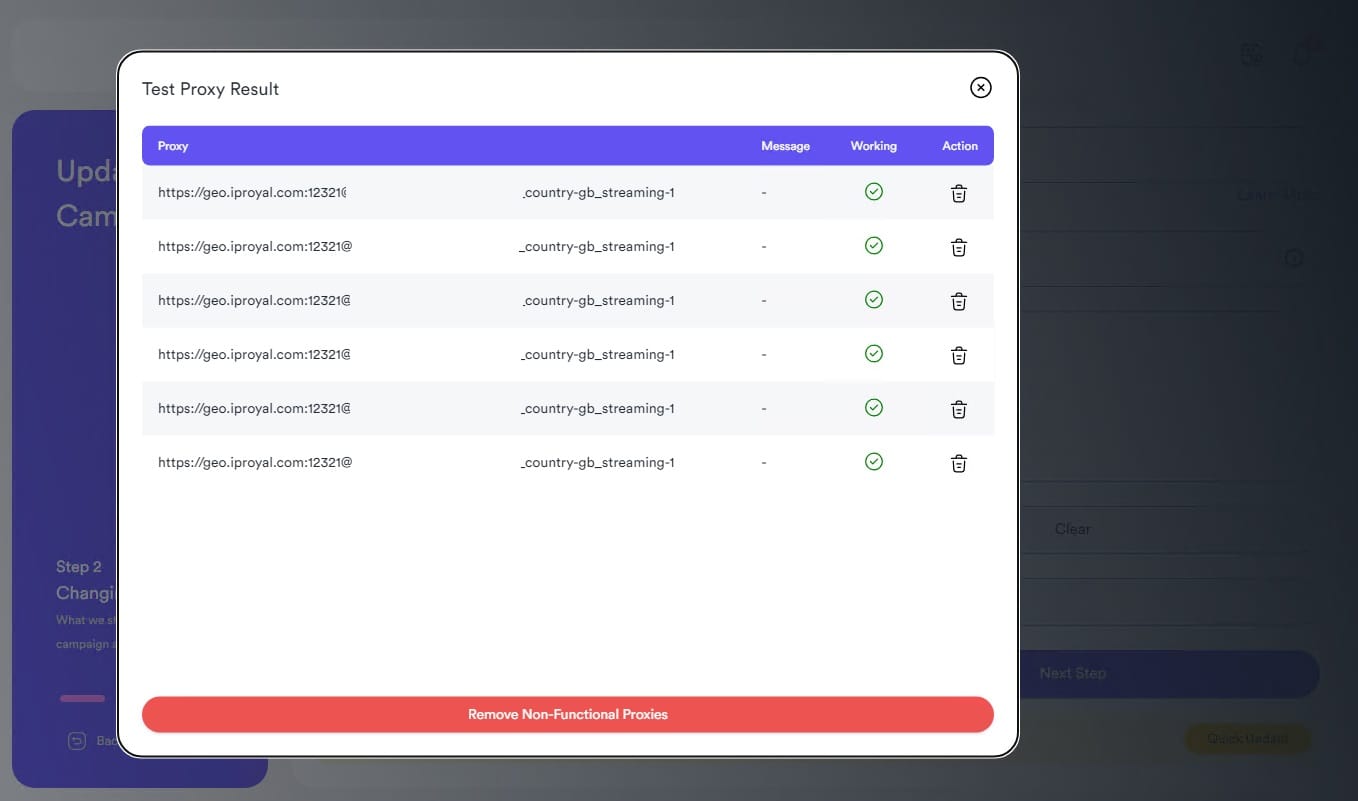
You can also check if the bot parsed your proxies correctly here. You can click on “Remove not working proxies” to remove all proxies that didn’t meet your settings. If you had set ping filtration, it is also applied in the results.
NOTE: If your proxies are backconnect (usually all residential proxies are backconnect, which means a random IP will be assigned at the back-end to your proxy, not a static proxy) ping filtration is not accurate. However, if your proxies have the session duration (TTL, Time-to-live, which means your proxy IP will stay at least for a few minutes), you can still use the ping filtration feature.
NOTE: The bot sends a request to a website to check if the connection to the proxies is truly being established. If the authentication is incorrect or even if your proxies are expired, it will be reported in the results as well.
STEP 4: Close the test reports and settings, you’re ready to run the bot with your proxies!
VPN Mode
VPN mode itself has 2 different modes. The first mode is Manual Setup and the second mode is Nord VPN(added on version 1.6.6 – DEPRECATED)
Manual VPN Mode
The manual setup supports literally all premium VPN providers which offer OVPN config files to the clients. If your VPN provider offers OpenVPN config files, then you’re ready to go!
To use Manual Mode you only need to follow these steps and you’ll be good to go! If you want to use NordVPN, simply skip this.
STEP1: If it’s the first time you want to use the VPN mode, you need to download the OpenVPN installer and install it. It’s the protocol used in the bot to make connections. You can download it from the link bottom:
https://openvpn.net/community-downloads/
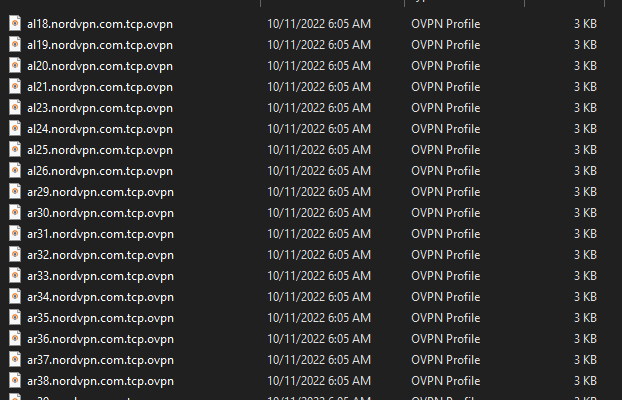
STEP2: Go to your VPN Provider’s website and search for manual OpenVPN configurations and credentials they offer. Download the .ovpn files and place them into a folder you’re willing to use.
STEP3: Select VPN mode > Manual Setup to open the manual configuration. Choose the directory where those ovpn files exist, enter the credentials you got from your VPN provider, and then you’re done! Please note that your username and password of Manual configuration files are different from your VPN account's credentials in the most of times. Please check your VPN provider's manual set up instructions about this.
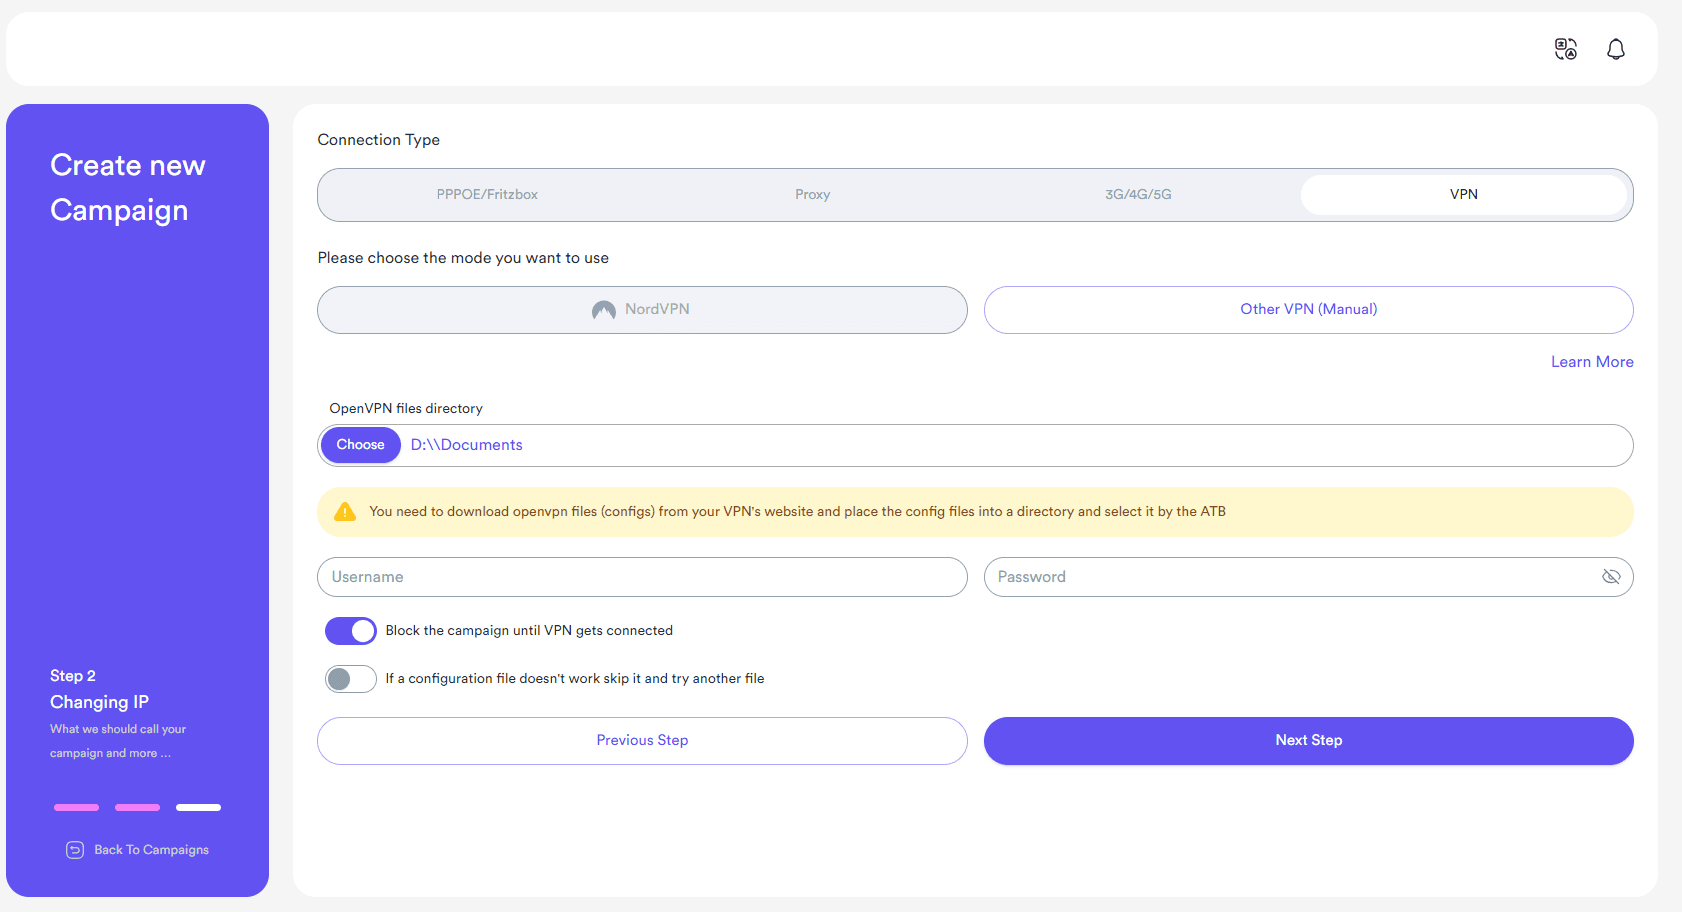
If you want to block all campaign(s) activity until the VPN gets fully connected (some VPN servers take a little bit longer than usual to connect), you can select “Block the campaign until the VPN gets connected”
Some OpenVPN config files may not get connected for any reasons. The bot has a feature to skip the config file if it didn’t connect and it will keep trying to connect to one server at the end.
NordVPN Mode
You can manually set up the bot to work with Nord VPN like mentioned in the previous step before but it’s never been easier than today! In this article, we’re going to learn how to use Awesome Traffic Bot with NordVPN.
WE STOPPED COOPERATION WITH NORDVPN. After talking with their team, it appears they don’t want clients to use their servers for sending traffic, and we’ve got reports that some of the users account have been blocked and refunded. Please try using other methods, although this method will still be available in the next few updates. But we’re going to deprecate this method soon.
We have several reports that IPs of Nord VPN have been mostly blocked by Google network and visitors usually don't count when you use their services.
STEP1: To use NordVPN, you’ll also need to download the OpenVPN protocol installer. If it’s the first time you want to use the VPN mode, you need to download the OpenVPN installer and install it. It’s the protocol used in the bot to make connections. You can download it from the link bottom:
https://openvpn.net/community-downloads/
STEP2: After purchasing the subscription, simply open the bot and click on the VPN mode > NordVPN. If it’s your first time using NordVPN mode, click on the load button to download and load countries of NordVPN servers.
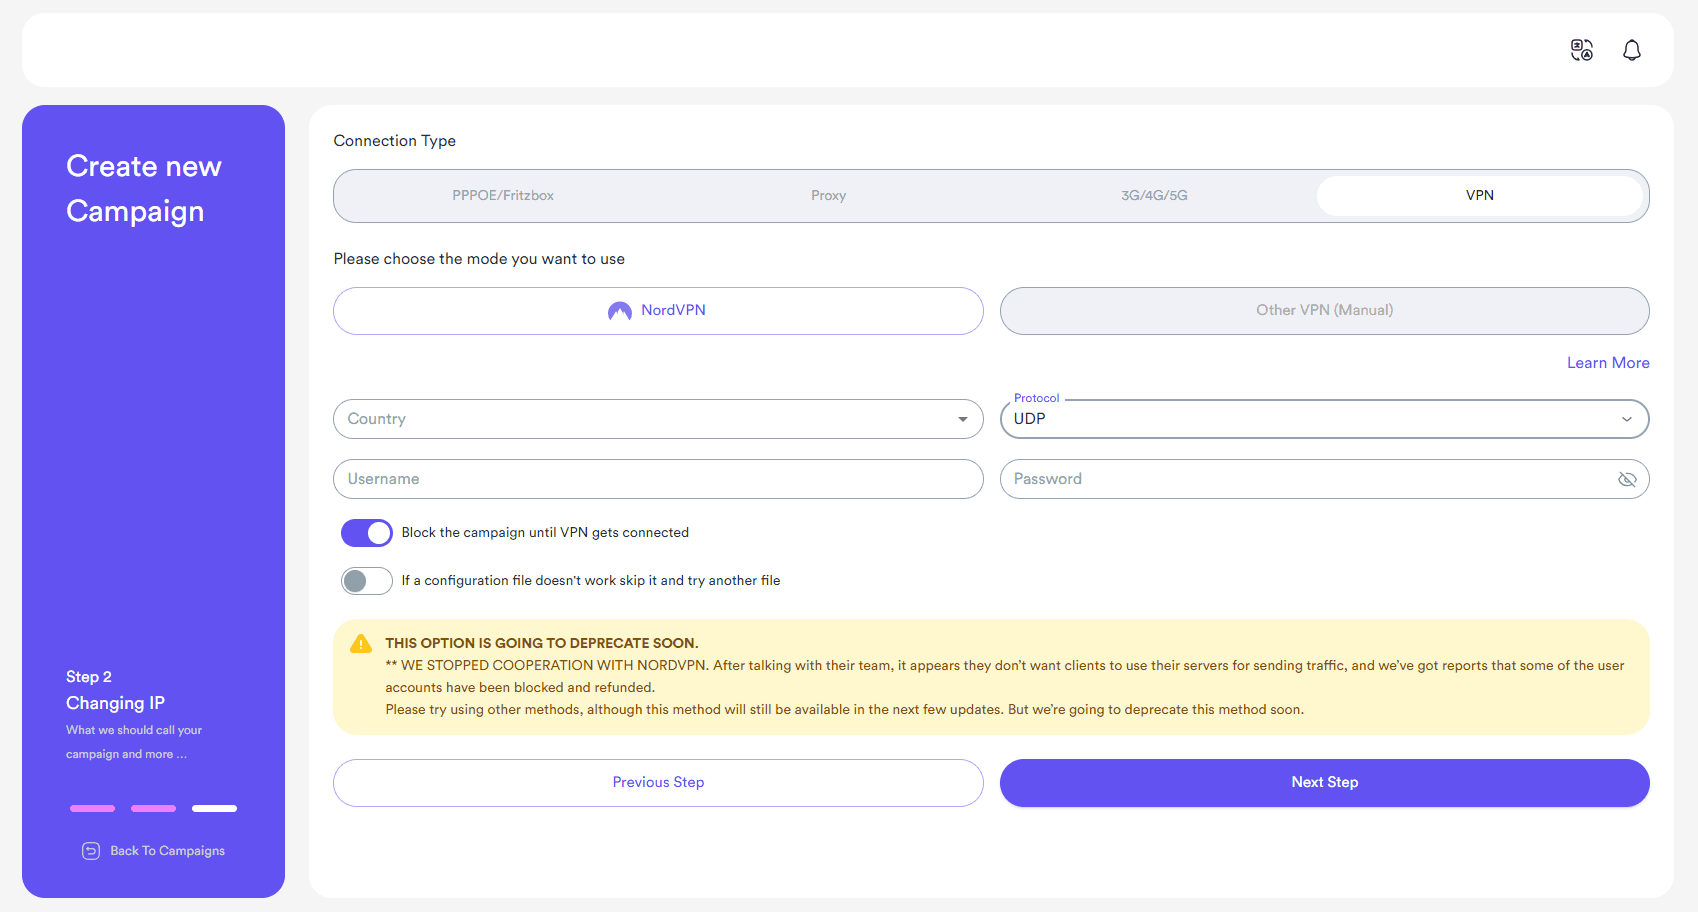
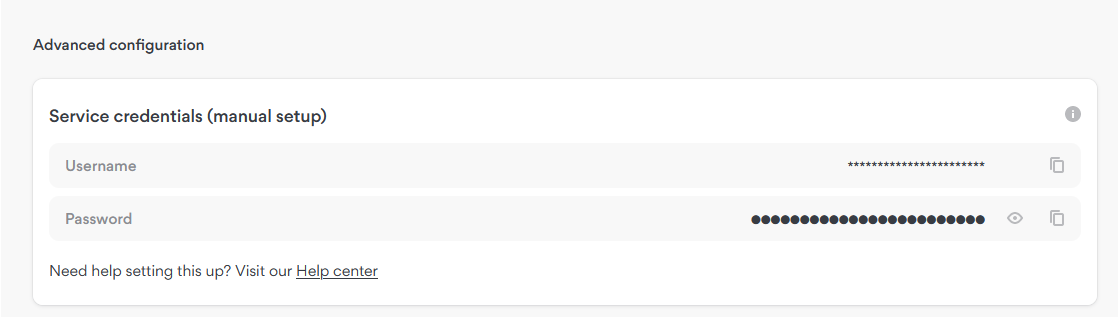
STEP3: After loading up the settings, you need to go to your NordVPN dashboard. After going to the panel, scroll down to Advanced Configuration> Service credentials (Manual setup and copy and paste the manual setup credentials into the bot.
STEP4: Save the settings and use the bot! Changing IP and sending traffic has been never easier than now!
You do NOT need to run the nordvpn application to use this method. If you run and connect to the nordvpn application, it will have conflicts with the application.
Phone Mode
This method uses android phone to connect to the interent and change the ISP. It has the similar activity to proxy hardware dongles. To set up this method, go to the campaigns settings > IP changing (step2) > Select Android phone (3G/4G/5G).
- Connect your phone to PC via USB
- Enable debugging mode ( and also secure debugging mode if you have a Xiaomi phone) in your phone.
You can follow this to more comprehensive guide for enabling the USB debugging https://www.howtogeek.com/129728/how-to-access-the-developer-options-menu-and-enable-usb-debugging-on-android-4.2/
If you're using a Xiaomi phone, you need to also enable the secure debugging mode.
- Enable your mobile data/internet and also the USB tethering for shring the internet.
- Turn off your PC’s WiFi as well as your mobile’s WiFi and get connected to the internet just by your phone’s network data. Also, make sure the computer doesn't use the internet of LAN connected devices.
- In the ATB and Phone Mode Configuration Page, you’ll see how many checks are passed. Depending on your android version, the bot will tell you what to do. If your android version is equal to or upper than 7, you’ll need to select the airplane mode icon of your phone in the bot (5 th step) The bot will instruct you on the next steps. You need to just click on select the point button. Then the bot will take and show a screenshot of your phone which you'll need to select the airplane mode icon in the bot.
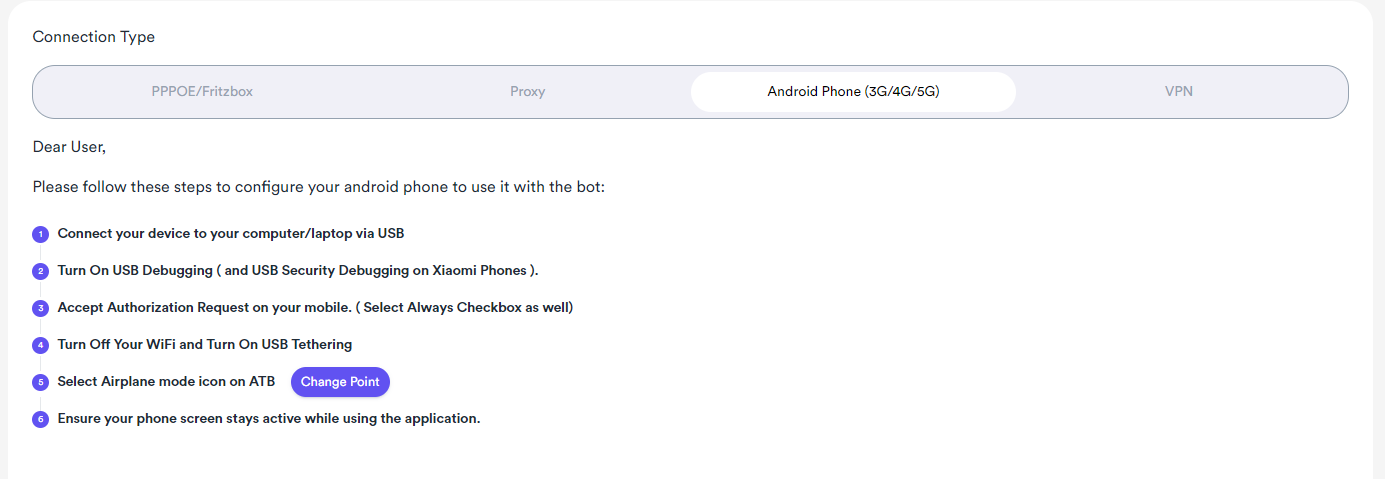
- Make sure your phone screen is always on when the bot is working. You may need to increase the screen timeout of your android phone.
If your sim card carrier or the android phone takes a longer time to change the IP or turn on and off the airplane mode, you can set the delay time in the advance options > delay section.
If your PC doesn’t recognize your phone when you connect your mobile via USB to the PC, you need to install your specific driver from here: https://developer.android.com/studio/run/oem-usb#Drivers
PPPoE Mode
One of the available methods in the application is called PPPoE. This mode is not available in all ISPs or modems.
Set up Bridge Mode in your modem
To use this method, usually your internet modem should be set in the bridge mode and be connected to your computer through a LAN cable.
To see your modem and ISP specific guide regarding setting up the Bridge mode, you should search on the internet.
By changing your router mode to bridge/PPPoE mode, you won't be able to use WiFi and connection will be only possible through a LAN cable and a broadband connection. If you want to use WiFi you should change the settings back to before.
Set up a broadband connection on your computer
After changing the router mode, you have to create a broadband connection on your windows, to do so:
Control Panel > Network and Internet > Network and Sharing Center > Setup New Connection Or Network > Connect The Internet > Setup The New Connection AnyWay > BroadBand
The broadband connection credentials should be provided by your ISP. However, they're usually the same with the credentials of your internet management panel.
If you don’t have this information you need to call your Internet provider. After entering the credentials you need to choose a name for your broadband connection and finalize the process.
You can check this video for setting up the broadband connection:
https://www.youtube.com/watch?v=r_8qdB_KNHY&ab_channel=NETVN82
After setting up the broadband connection, you'll need to enter its information inside the bot:
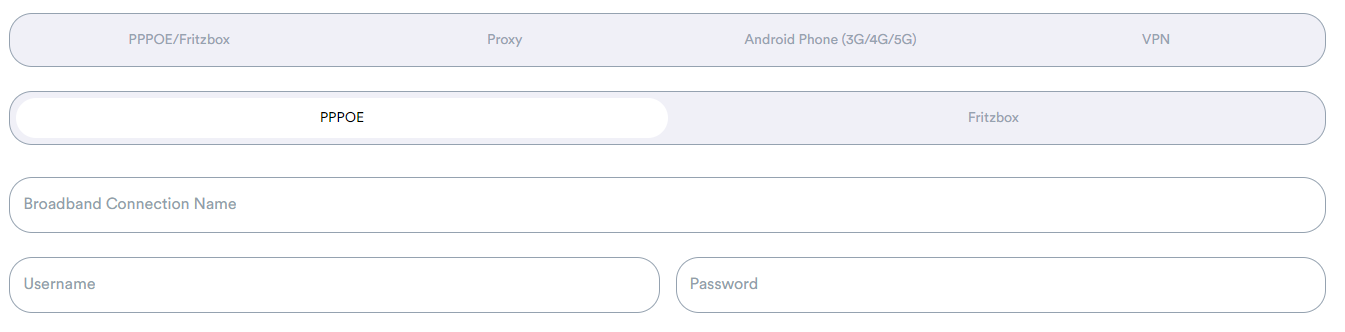
Fritzbox
To use this method, your Fritzbox should be directly connected to the internet fiber and not as an intermediary router.
Login to your fritzbox panel (fritz.box) and copy the session id that is generated. You can find the session id by copying the one of links in the panel. You can right click on one of the links in the panel to find out the session id (sid).

cb40a7ad1d317ab5 is the session id in our example. You will need to enter this id into the software and that’s it!