Connection Setup (Changing IP)
Step 2 of the wizard decides how visitors get their IP addresses. Three top-level choices: 🔥 Dalga IPs, Manual Configuration, or None (use your real connection). For the trade-offs between methods, read IP Changing Methods first.
Dalga IPs
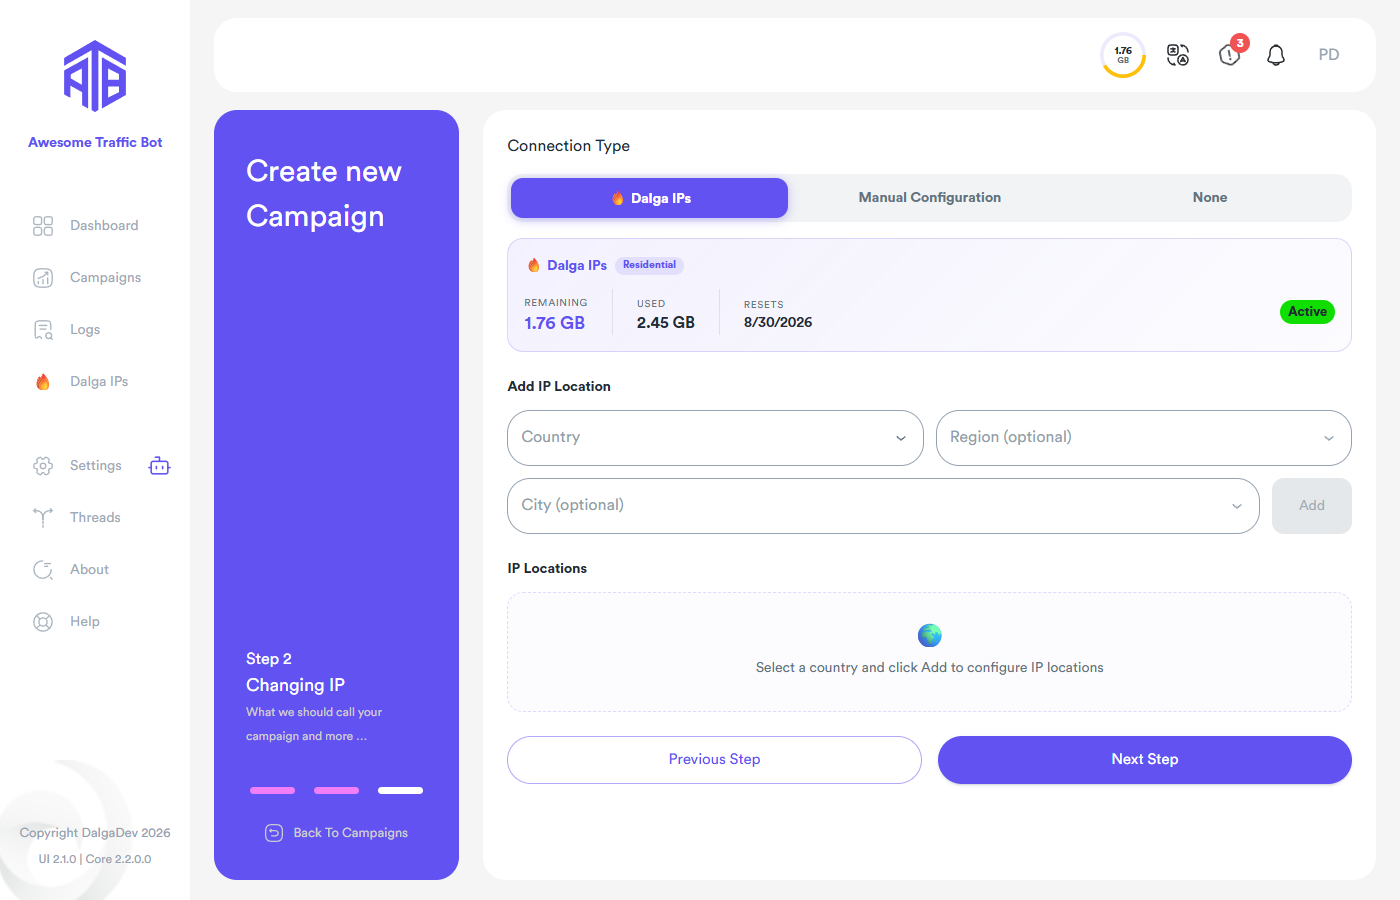
The built-in residential proxy service. The panel shows your remaining/used bandwidth and reset date. Pick a Country (plus optional Region and City) and click Add — you can add several locations and the bot rotates among them. That's the entire setup; managing bandwidth and top-ups is covered in Dalga IPs.
Video walkthrough: Dalga IPs — send SEO/CTR traffic from any country or city.
While Dalga IPs mode is active, connections that would bypass the proxy are blocked automatically, and adding manual proxies to the same campaign will ask to drop the Dalga IPs selection first.
Proxy
The bot accepts HTTP(S), SOCKS4 and SOCKS5 proxies. IPv6 is not supported.
SOCKS4/SOCKS5 proxies must be IP-whitelisted (no authentication). HTTP(S) proxies can use username/password authentication.
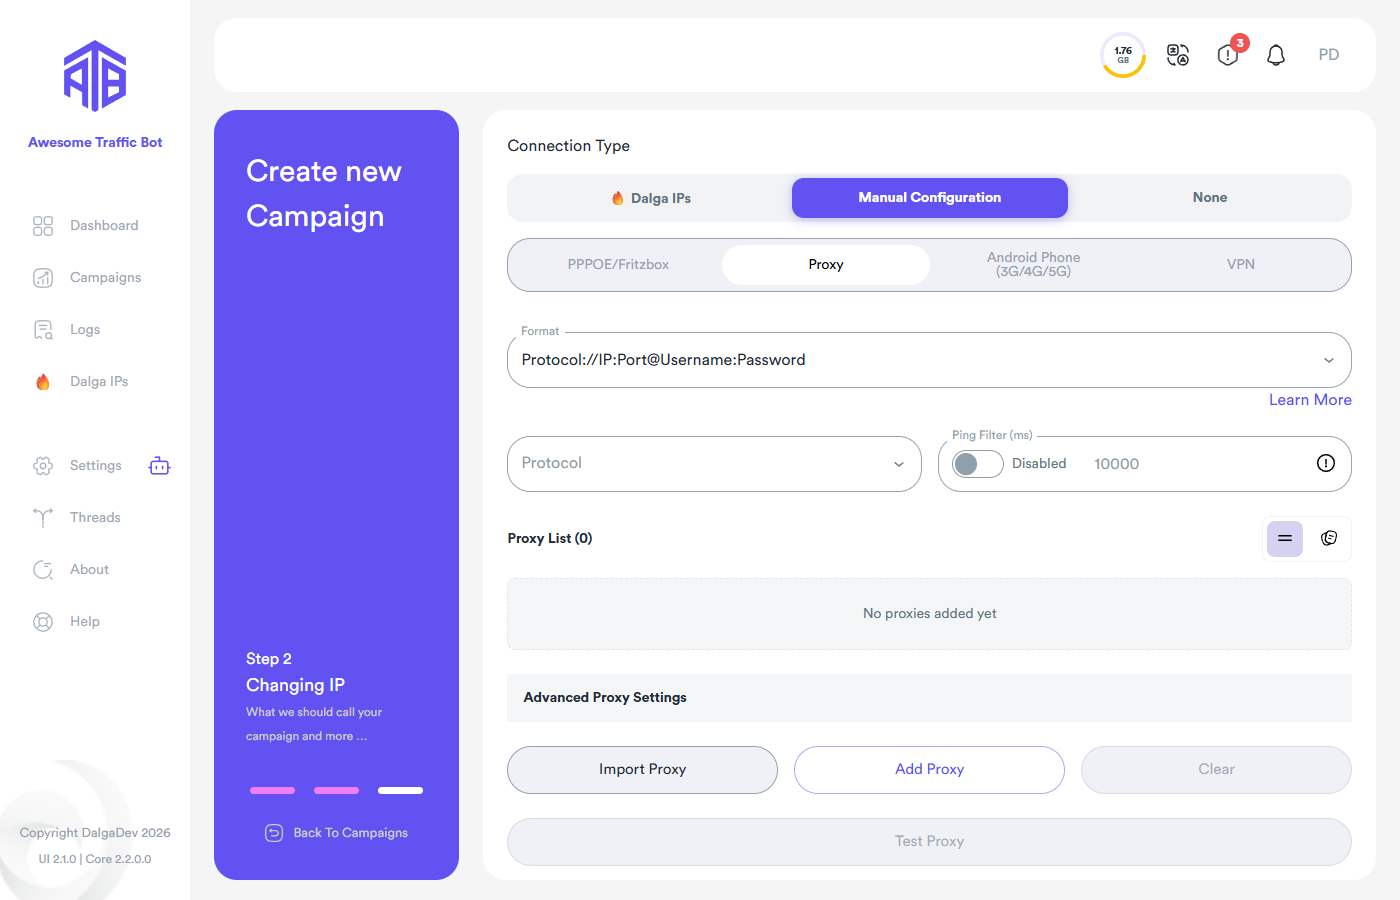
Importing proxies (choose the right format)
Export your proxies from your provider into a text file, then Import Proxy and pick the format that matches your file from the dropdown:

For example, if your text file lines look like 192.168.0.0:80:username:password, select Protocol://IP:Port:Username:Password.
The selected format must match your file exactly — otherwise the bot can't import the proxies.
For rotating proxies with an API that changes the IP, append the API link after a |:
Protocol://IP:Port@Username:Password|API Link
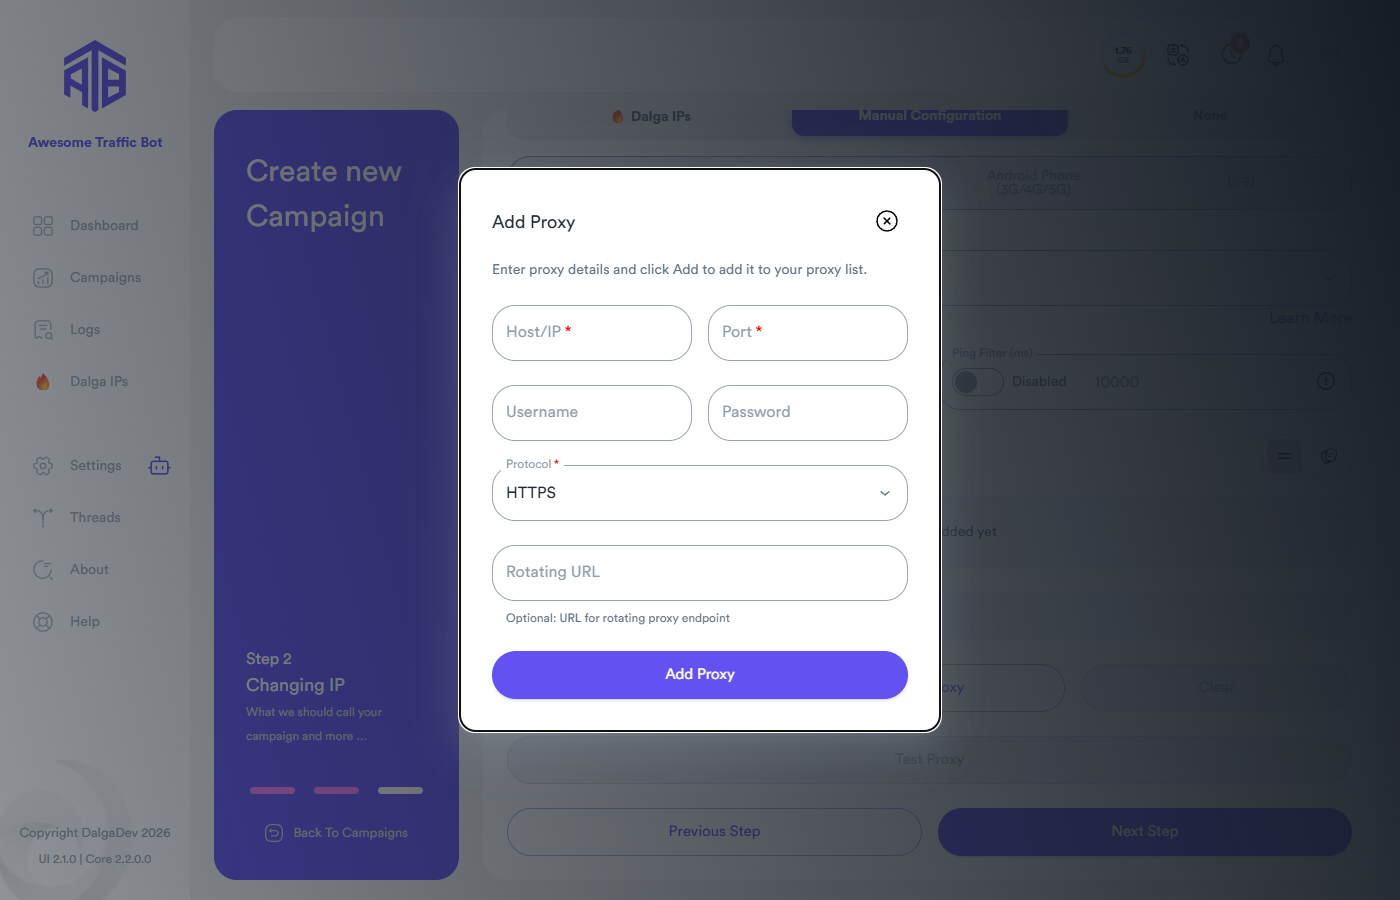
The bot calls that API to change the IP after each visitor session. (The single-proxy Add Proxy dialog has the same option as its Rotating URL field.)
In-house proxies are supported — if you run your own proxy warehouse at home, you can use it here too.
Testing and filtering
- Test Proxy — verifies each proxy actually connects (bad auth or expired proxies are reported). With many proxies this takes a while.
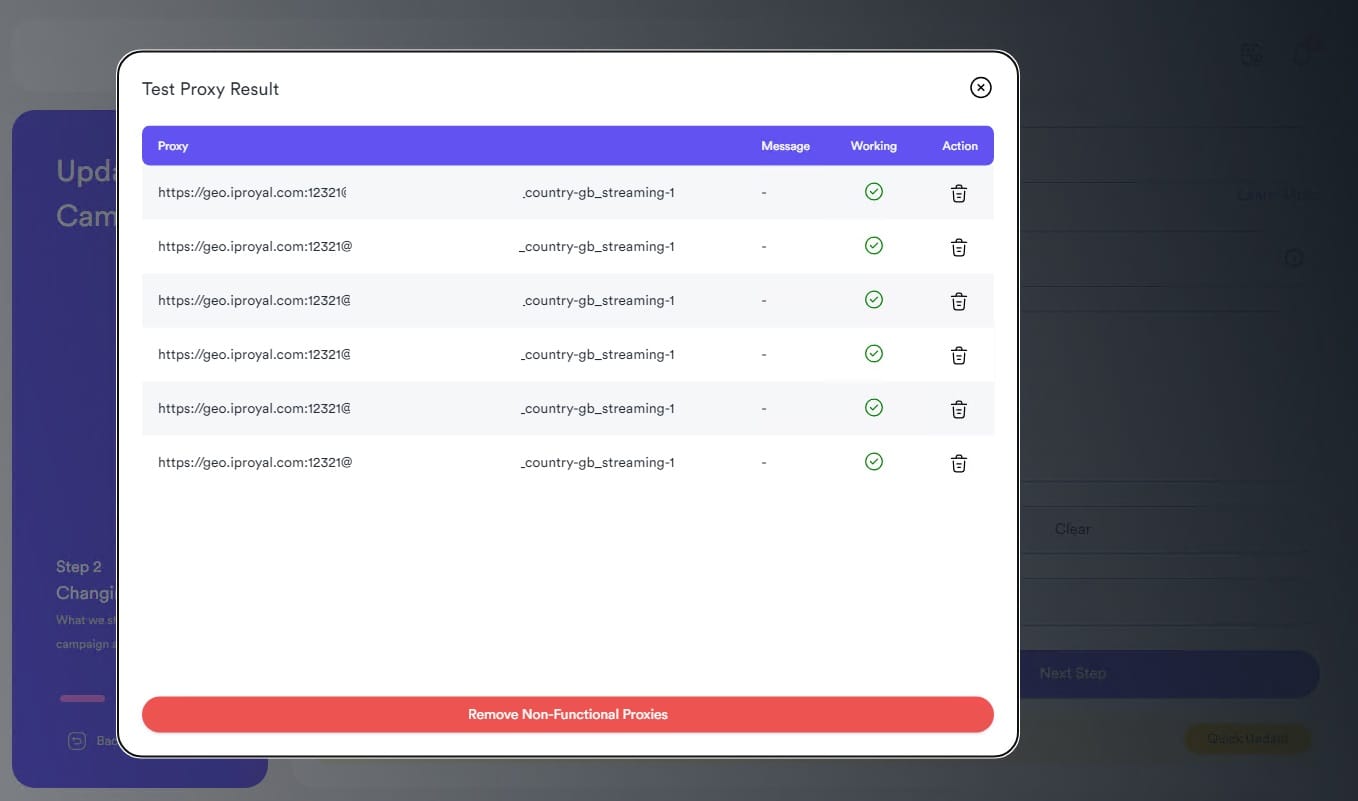
- After testing, Remove not working proxies drops everything that failed your settings (ping filter included).
- Ping Filter (ms) — skip proxies slower than the threshold (disabled by default).
Ping filtration isn't accurate for backconnect/residential proxies (a random back-end IP is assigned per request) unless they have a session duration (TTL) keeping the IP for a few minutes. Also, filtering through hundreds of slow proxies can stall the bot.
Advanced Proxy Settings
- Block connection on proxy errors — instead of erroring, the bot retries a few times, then moves to the next campaign if the proxy keeps failing.
- Proxy Rotation Timing — rotate to the next proxy Before session, After session, or Both.
Android Phone (3G/4G/5G)
This method uses an Android phone's mobile data to change the ISP IP — similar to a hardware proxy dongle. Select Android Phone (3G/4G/5G) on Step 2, then:
- Connect the phone to the PC via USB.
- Enable USB debugging on the phone (how-to guide).
Xiaomi phones
On Xiaomi phones you must also enable secure/USB debugging (security settings).
- Enable mobile data and USB tethering to share the phone's internet (tethering guide).
- Turn off WiFi on both the PC and the phone, and make sure the PC isn't using a LAN connection — the computer should reach the internet only through the phone's data.
- On the Phone Mode Configuration page ATB shows which checks pass. For Android 7 or newer you'll be asked to point out the airplane-mode icon: click Select the point, and the bot screenshots your phone so you can mark the airplane-mode toggle. Follow the on-screen steps.
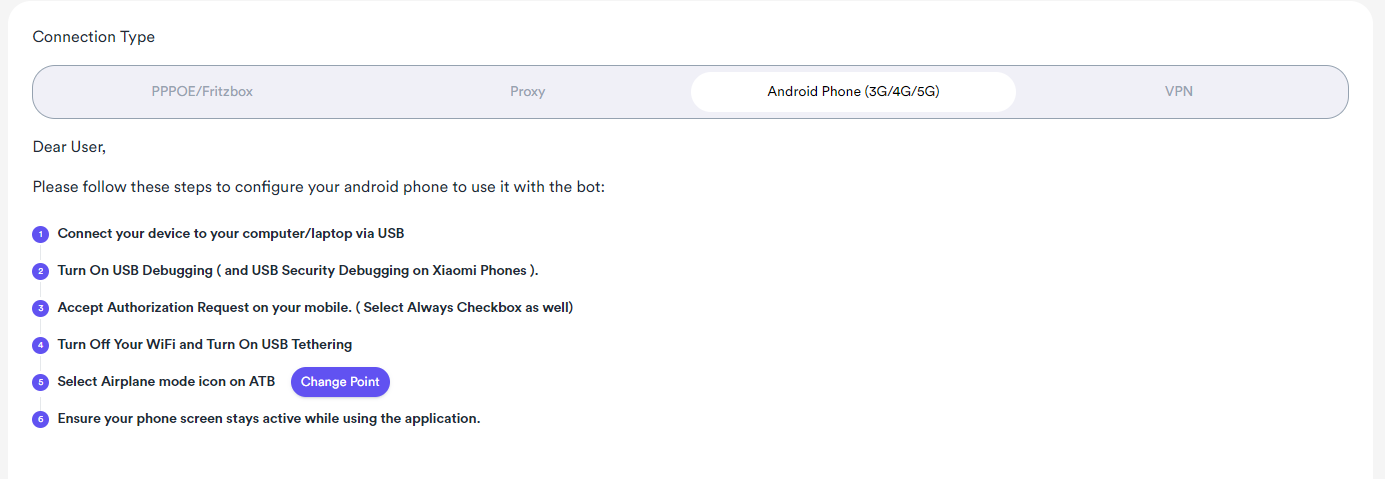
- Keep the phone screen on while the bot runs — increase the screen timeout if needed.
If your carrier or phone is slow to toggle airplane mode / change IP, raise the wait under Advanced options → Delay.
If the PC doesn't recognize the phone over USB, install your device's driver from Google's OEM USB drivers list.
VPN
VPN mode has two options: Manual Setup (recommended) and NordVPN (deprecated).
Manual VPN (recommended)
Works with any premium VPN provider that offers OpenVPN (.ovpn) config files.
-
First time only: install the OpenVPN community client — the protocol ATB uses to connect: openvpn.net/community-downloads.
-
On your VPN provider's site, find their manual OpenVPN configurations, download the
.ovpnfiles, and put them in a folder.
-
Choose VPN → Manual Setup, point it at that folder, and enter the credentials.
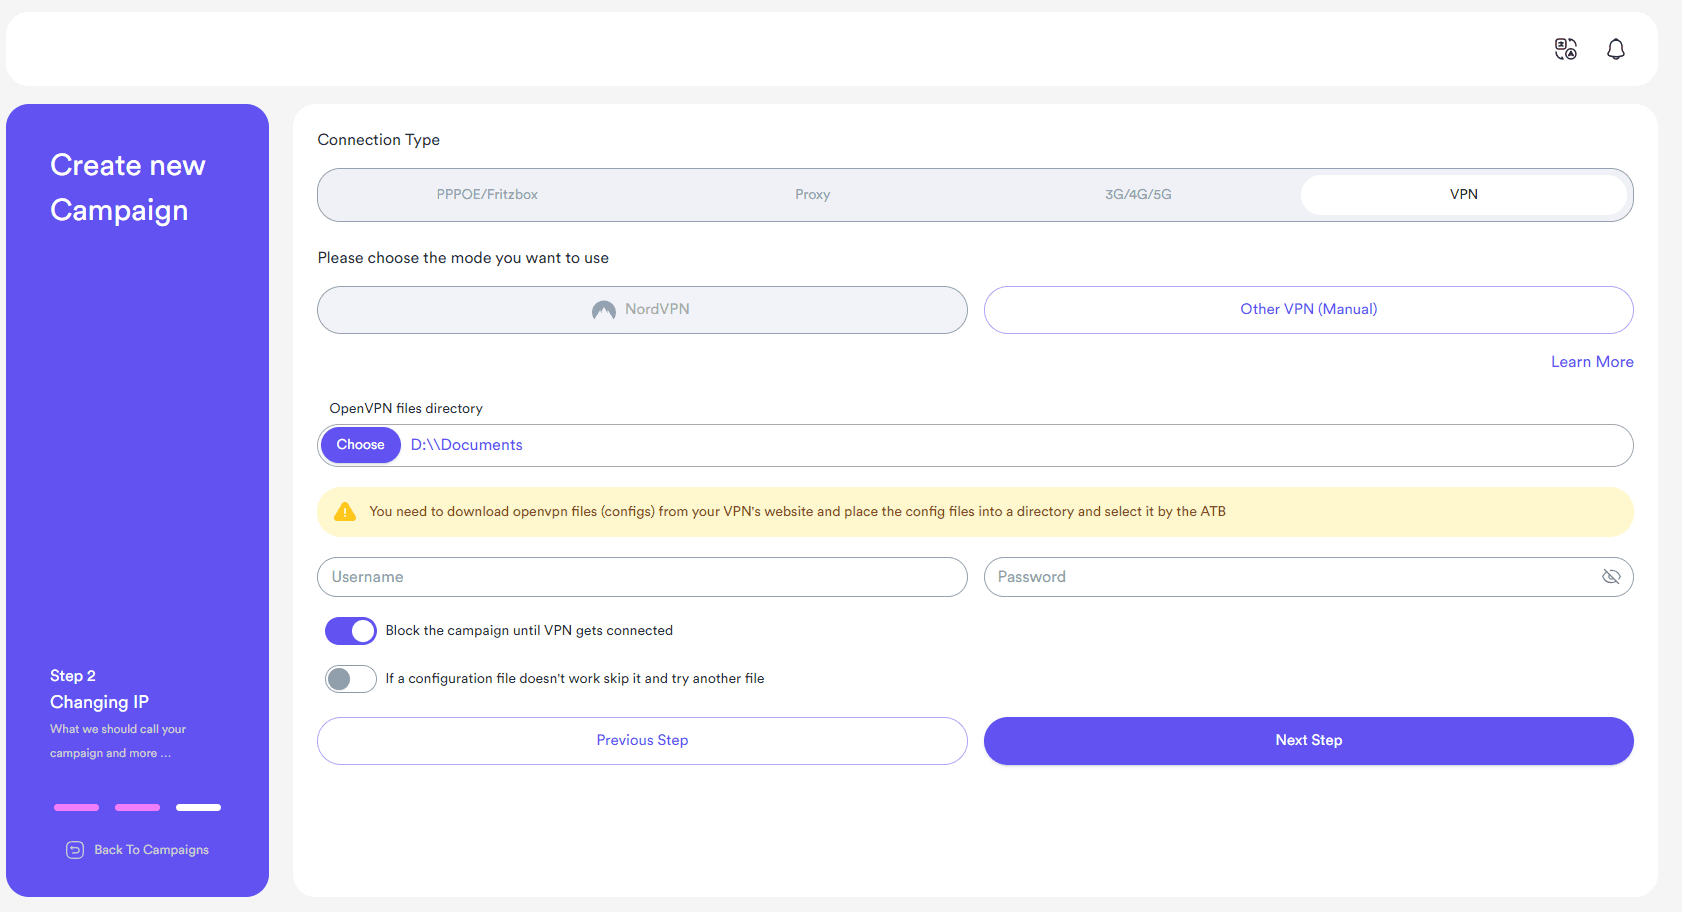 note
noteManual-config username/password are usually different from your VPN account login — check your provider's manual-setup page.
Options: Block the campaign until VPN gets connected (some servers are slow to connect) and skip a config file that won't connect and try another.
NordVPN
NordVPN cooperation has ended — they don't permit traffic-sending and some accounts were blocked/refunded; their IPs are also widely blocked by Google so visits often don't count. Use Manual VPN or another method. The option remains for now but will be removed in a future update.
PPPOE / Fritzbox
This mode isn't available on all ISPs or modems.
1. Put your modem in Bridge Mode
Your modem must be in bridge mode, connected to the PC by a LAN cable. Search for your specific modem/ISP bridge-mode guide.
In bridge/PPPoE mode your WiFi is disabled — the connection works only over the LAN cable and a broadband connection. Revert the router settings to use WiFi again.
2. Create a Windows broadband connection
After switching the router, create a broadband (PPPoE) connection in Windows:
Control Panel → Network and Internet → Network and Sharing Center → Set up a new connection or network → Connect to the Internet → Set up a new connection anyway → Broadband
The credentials come from your ISP (usually the same as your internet-management panel login) — call them if you don't have them. Give the connection a name and finish.
Video guide for creating the broadband connection: youtu.be/r_8qdB_KNHY.
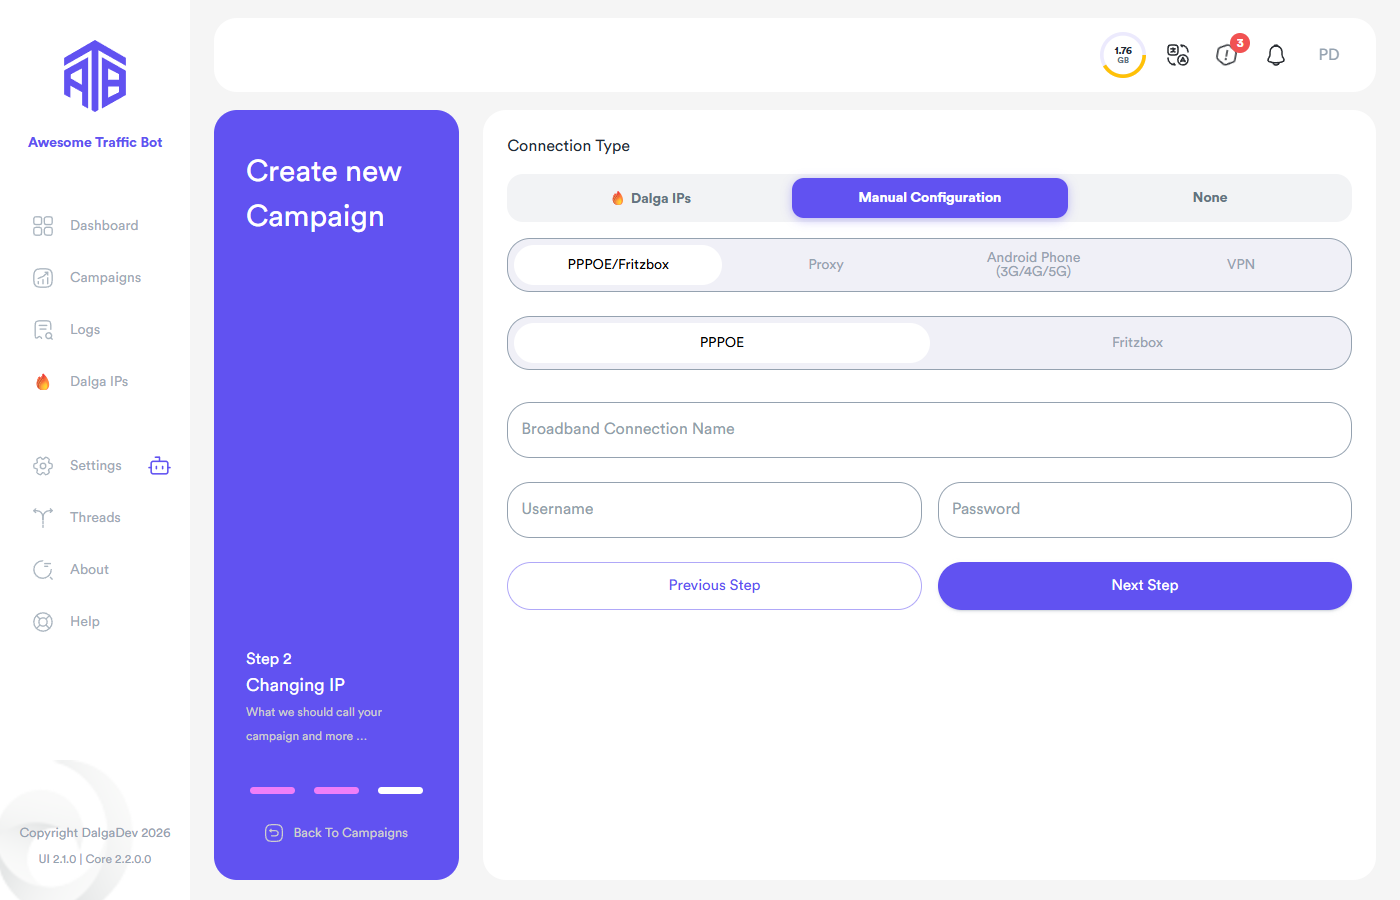
Then enter the broadband Connection Name and its Username/Password in the bot; ATB redials it to change the IP.
Fritzbox
Your Fritzbox must be directly connected to the internet fiber, not acting as an intermediary router.
Log into your Fritzbox panel (fritz.box) and copy the session id (sid) it generates — right-click one of the links in the panel to reveal the sid:

In the example above the session id is cb40a7ad1d317ab5. Enter that id into the software and you're set.
None
No IP changing — all visitors come from your real IP. Use it for testing your task setup before spending bandwidth or proxies.