Quickstart — Your First Campaign
This walkthrough creates a simple Google search campaign that sends visitors to your website. It takes about five minutes. Every screen shown here is covered in depth in Creating Campaigns.
Prefer video? This full walkthrough covers the same ground (with chapters in the description):
1. Create a new campaign
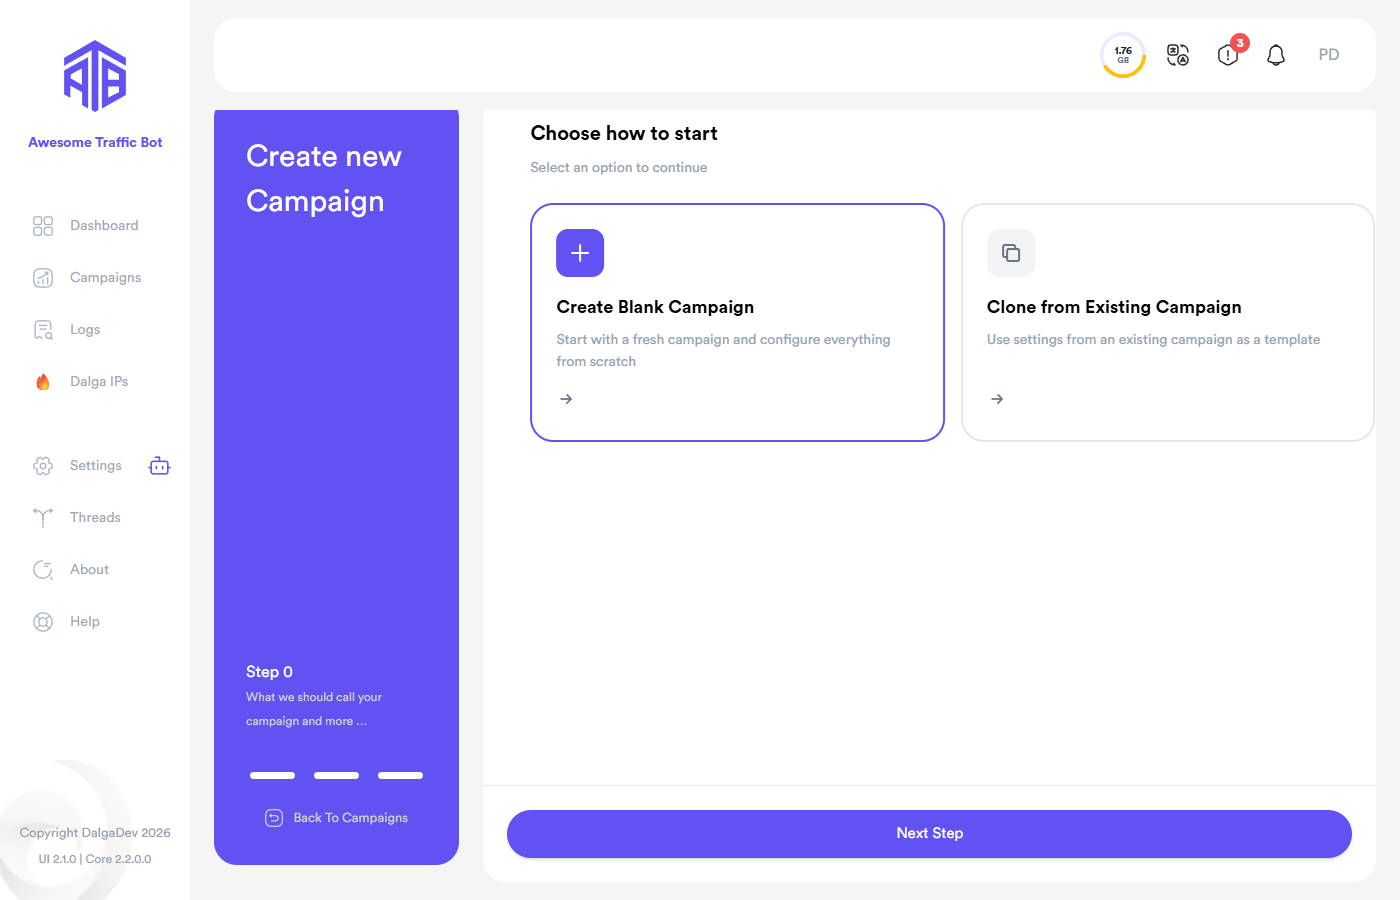
Go to Campaigns in the sidebar and click New Campaign. Choose Create Blank Campaign and click Next Step. (Once you have campaigns, you can also clone one as a template.)
2. Name it and set the basics
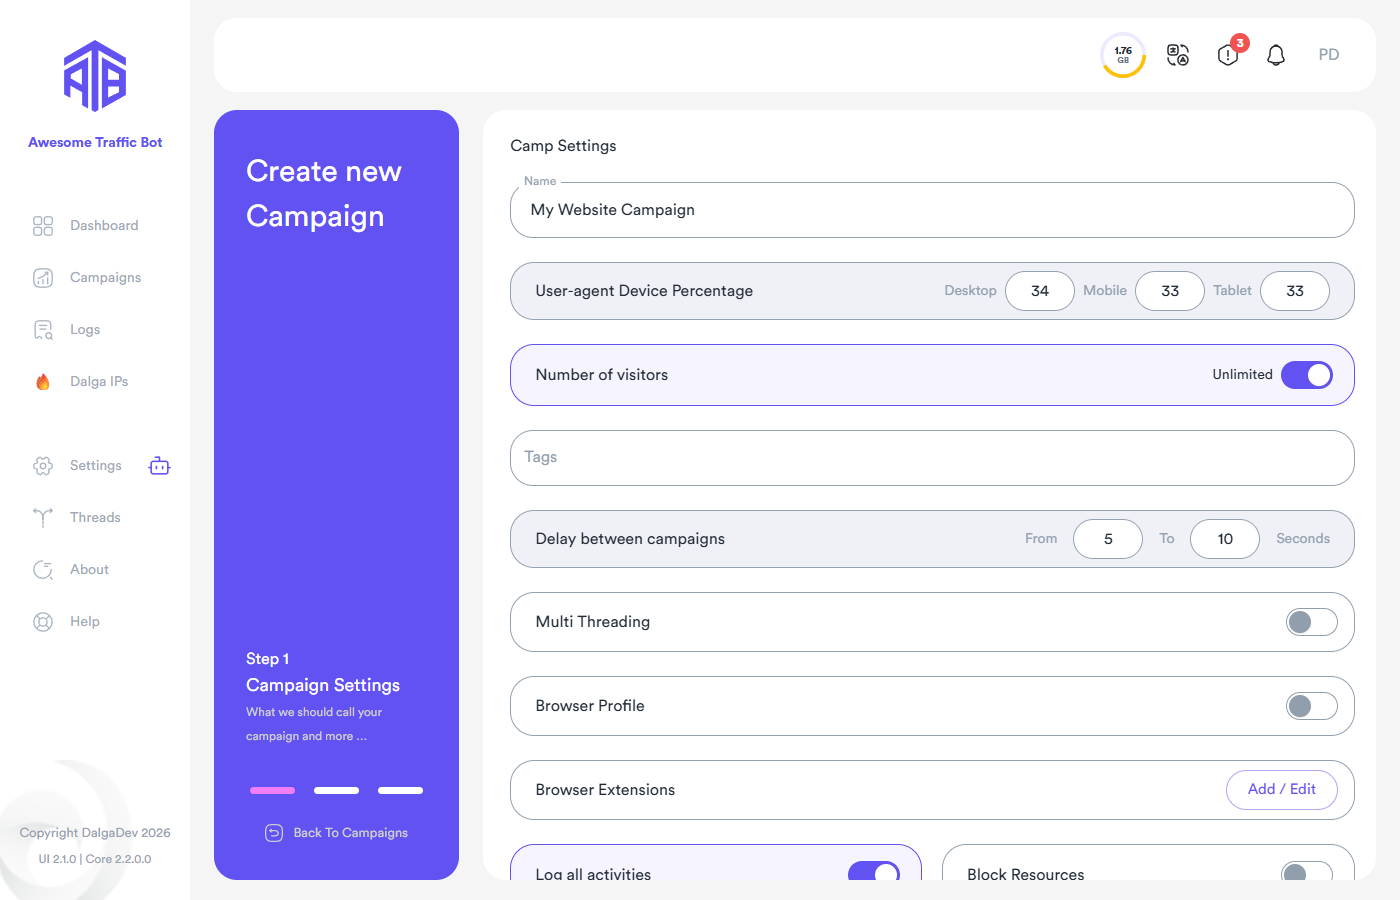
On Step 1 — Campaign Settings:
- Give the campaign a Name.
- Leave the device percentages (Desktop/Mobile/Tablet) as they are.
- Keep Number of visitors on Unlimited for now, or set a fixed number.
Click Next Step.
3. Choose how IPs change
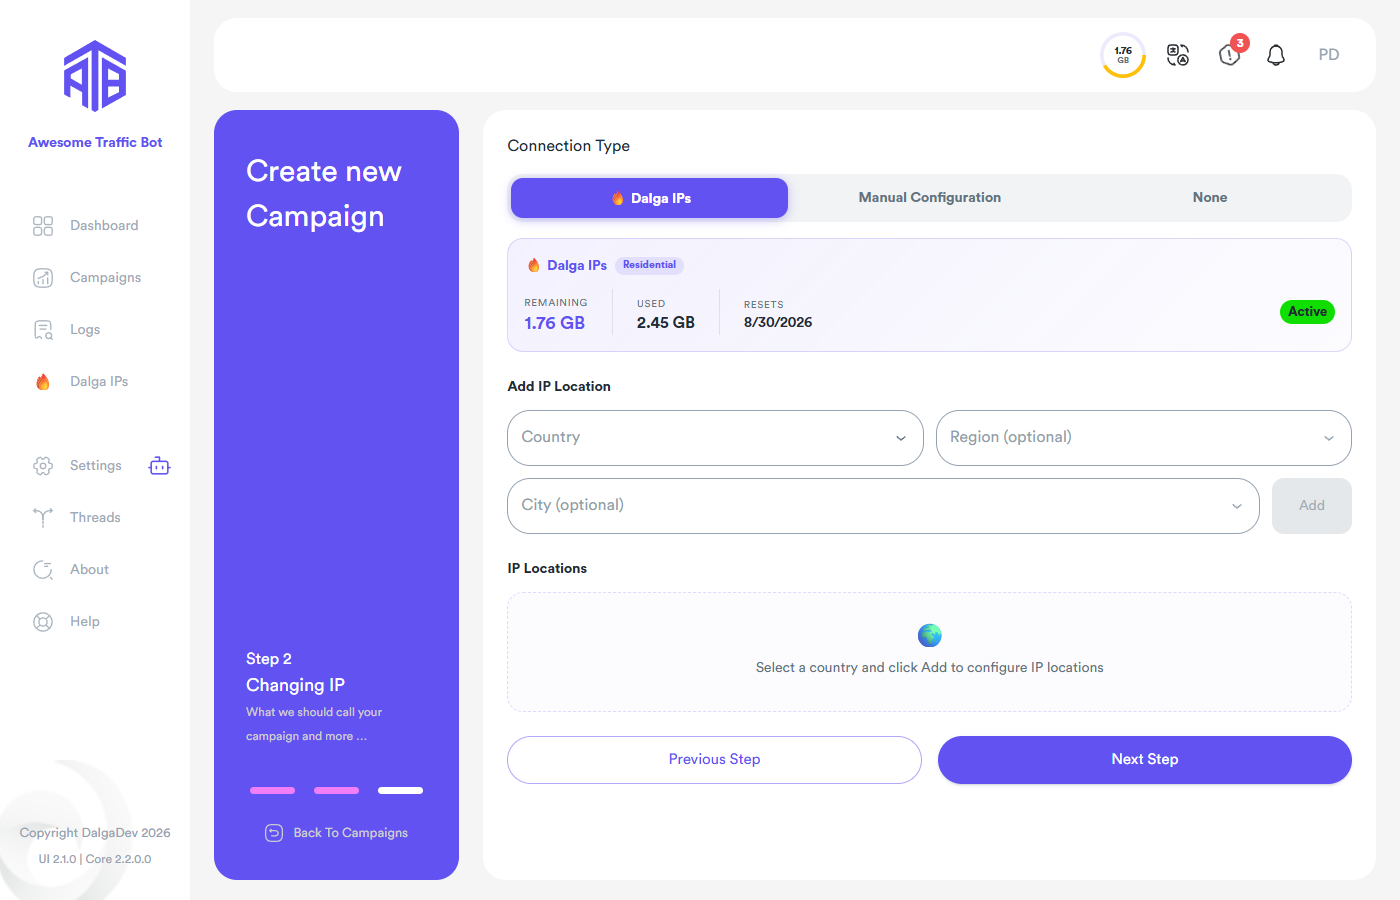
On Step 2 — Changing IP, pick a connection type:
- 🔥 Dalga IPs — easiest: built-in residential proxies. Pick a country and click Add. Requires bandwidth on your account — see Dalga IPs.
- Manual Configuration — bring your own proxies, VPN, PPPoE, or Android phone. See Connection setup.
- None — use your real connection (fine for a first test).
Click Next Step.
4. Add a task
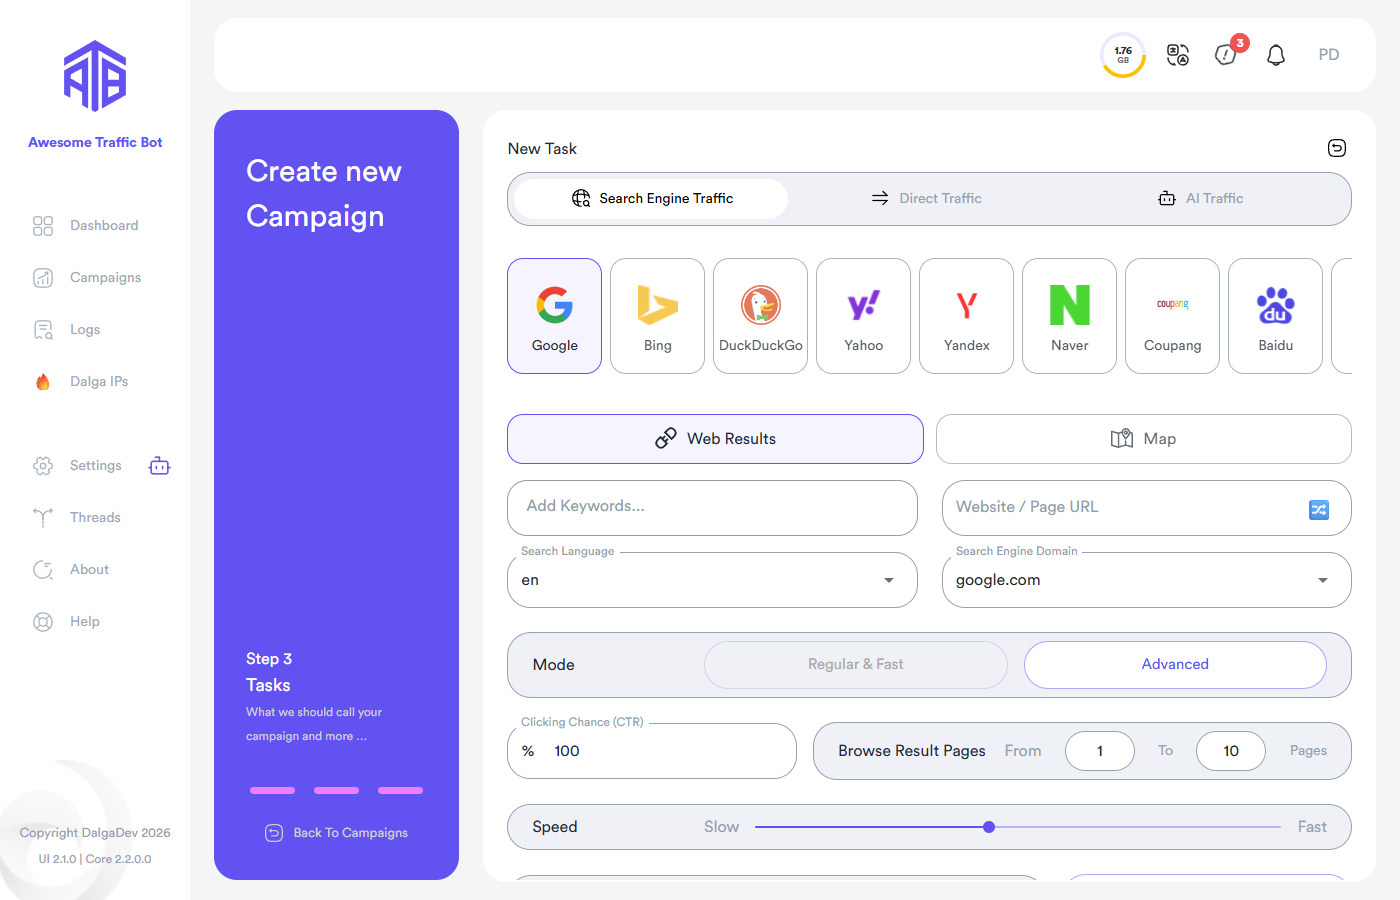
On Step 3 — Tasks, stay in the Classic view and click Add Task:
- Keep Search Engine Traffic → Google → Web Results.
- Add one or two keywords you want to be found for.
- Enter your Website / Page URL.
- Leave the rest at defaults and click Add Task at the bottom.
Click Create Campaign.
5. Start it
Back on the Campaigns page, press the Start (▶) button on your campaign row — or Start All at the top. Threads will launch browsers, search your keyword, find your site, click it, and browse it like a human.
Watch progress in:
- the Sent views column and campaign Status,
- the Logs page for a step-by-step account of each session,
- the Dashboard for daily totals.
Where to go from here
- Fine-tune CTR, result-page browsing, session duration, and bounce rate → Search Engine Tasks.
- Schedule campaigns to run on specific days/times → Scheduling.
- Let the number of threads manage itself → Threads & AutoPilot.
- Build multi-step journeys visually → Flow editor.